<?xml version="1.0" encoding="utf-8"?><feed xmlns="http://www.w3.org/2005/Atom" ><generator uri="https://jekyllrb.com/" version="4.4.1">Jekyll</generator><link href="/feed.xml" rel="self" type="application/atom+xml" /><link href="/" rel="alternate" type="text/html" /><updated>2025-12-07T10:54:09+00:00</updated><id>/feed.xml</id><title type="html">Max’s Homepage</title><subtitle>My simple portfolio</subtitle><author><name>Max Rossmannek</name></author><entry><title type="html">coBib becomes fuzzy!</title><link href="/programming/cobib-becomes-fuzzy/" rel="alternate" type="text/html" title="coBib becomes fuzzy!" /><published>2024-05-28T00:00:00+00:00</published><updated>2024-05-28T00:00:00+00:00</updated><id>/programming/cobib-becomes-fuzzy</id><content type="html" xml:base="/programming/cobib-becomes-fuzzy/"><![CDATA[<p>A long-desired feature has just landed in coBib v5.1.0: the ability to
<em>fuzzy</em>-find entries in the database! In this post I will briefly showcase this
functionality and how it can make your life easier.</p>

<h1 id="tldr">TL;DR</h1>

<p>For the <code class="language-plaintext highlighter-rouge">list</code> and <code class="language-plaintext highlighter-rouge">search</code> commands you now have three new command-line
arguments:</p>
<div class="language-bash highlighter-rouge"><div class="highlight"><pre class="highlight"><code><table class="rouge-table"><tbody><tr><td class="rouge-gutter gl"><pre class="lineno">1
2
3
</pre></td><td class="rouge-code"><pre>cobib search <span class="nt">--decode-latex</span> <span class="s2">"naïve"</span>    <span class="c"># will still find `na{\"\i}ve`</span>
cobib search <span class="nt">--decode-unicode</span> <span class="s2">"naive"</span>  <span class="c"># will still find `naïve`</span>
cobib search <span class="nt">--fuzziness</span> 1 <span class="s2">"naive"</span>     <span class="c"># also finds `naïve`</span>
</pre></td></tr></tbody></table></code></pre></div></div>
<p>For the <code class="language-plaintext highlighter-rouge">list</code> command, these argument affect the filter mechanism.
You can set your own default values via the respective settings in your
configuration file.</p>

<h1 id="what-is-fuzzy-finding">What is fuzzy finding?</h1>

<p>Fuzzy finding refers to approximate string matching<sup id="fnref:1"><a href="#fn:1" class="footnote" rel="footnote" role="doc-noteref">1</a></sup> which allows you to
relate two strings to each other if they are <em>approximately</em> equal.
What exactly this approximation entails can differ; but in general there are
three primitive kinds of errors:</p>
<ul>
  <li>insertions: <code class="language-plaintext highlighter-rouge">cot -&gt; cost</code></li>
  <li>deletions: <code class="language-plaintext highlighter-rouge">coat -&gt; cot</code></li>
  <li>substitutions: <code class="language-plaintext highlighter-rouge">coat -&gt; cost</code></li>
</ul>

<p>The more errors you allow, the more approximate (or “fuzzy”) your comparison
becomes.</p>

<h1 id="how-can-you-use-this-in-cobib">How can you use this in coBib?</h1>

<p>coBib v5.1.0 has added support for approximate string comparisons for two use
cases:</p>
<ul>
  <li>when using <em>filters</em> to limit the output of the <code class="language-plaintext highlighter-rouge">list</code> command</li>
  <li>when searching your database with the <code class="language-plaintext highlighter-rouge">search</code> command</li>
</ul>

<p>In both of these cases, coBib relies on the functionality provided by the
<code class="language-plaintext highlighter-rouge">regex</code><sup id="fnref:2"><a href="#fn:2" class="footnote" rel="footnote" role="doc-noteref">2</a></sup> package. This is a new optional dependency of coBib, so be sure to
install it if you want to use this functionality.</p>

<p>Since the <code class="language-plaintext highlighter-rouge">regex</code> package is a drop-in replacement for Python’s builtin
<code class="language-plaintext highlighter-rouge">re</code><sup id="fnref:3"><a href="#fn:3" class="footnote" rel="footnote" role="doc-noteref">3</a></sup> module, and coBib already supported standard regex patterns for both of
these use cases, the extension to support fuzzy matching was almost straight
forward.</p>

<p>In the following, we will explore the new ways for fuzzy finding entries in your
database, using the following entry as our example:</p>
<div class="language-latex highlighter-rouge"><div class="highlight"><pre class="highlight"><code><table class="rouge-table"><tbody><tr><td class="rouge-gutter gl"><pre class="lineno">1
2
3
4
5
6
7
8
9
</pre></td><td class="rouge-code"><pre>@unpublished<span class="p">{</span>Battaglia2024,
 archivePrefix = <span class="p">{</span>arXiv<span class="p">}</span>,
 arxivid = <span class="p">{</span>2404.18737v1<span class="p">}</span>,
 author = <span class="p">{</span>Battaglia, Stefano and Rossmannek, Max and Rybkin, Vladimir V. and Tavernelli, Ivano and Hutter, J<span class="p">{</span><span class="k">\"</span>u<span class="p">}</span>rg<span class="p">}</span>,
 eprint = <span class="p">{</span>http://arxiv.org/abs/2404.18737v1<span class="p">}</span>,
 primaryClass = <span class="p">{</span>physics.chem-ph<span class="p">}</span>,
 title = <span class="p">{</span>A general framework for active space embedding methods: applications in quantum computing<span class="p">}</span>,
 year = <span class="p">{</span>2024<span class="p">}</span>
<span class="p">}</span>
</pre></td></tr></tbody></table></code></pre></div></div>

<h2 id="using-regex-patterns-directly">Using <code class="language-plaintext highlighter-rouge">regex</code> patterns directly</h2>

<p>You have full control over the regex patterns that are used for filter matching
and/or searching. As such, you can use all of the additional features provided
by the <code class="language-plaintext highlighter-rouge">regex</code> package.</p>

<p>In the following, we will review how to write custom patterns to allow for the
different kinds of errors listed above.</p>

<h3 id="insertion-errors">Insertion errors</h3>

<p>We can allow a number of characters to be inserted into our query string by
writing a <code class="language-plaintext highlighter-rouge">regex</code> pattern of the form: <code class="language-plaintext highlighter-rouge">(Rossmanek){i&lt;2}</code>.
This will match all occurrences of <code class="language-plaintext highlighter-rouge">Rossmanek</code> with up to one additional
arbitrary characters inserted into it, e.g. <code class="language-plaintext highlighter-rouge">Rossmannek</code>.</p>

<p>Let’s try it out:</p>
<div class="language-bash highlighter-rouge"><div class="highlight"><pre class="highlight"><code><table class="rouge-table"><tbody><tr><td class="rouge-gutter gl"><pre class="lineno">1
</pre></td><td class="rouge-code"><pre>cobib list ++author <span class="s2">"(Rossmanek){i&lt;2}"</span>
</pre></td></tr></tbody></table></code></pre></div></div>
<p>And indeed, the query was able to find our entry above:</p>
<div class="language-plaintext highlighter-rouge"><div class="highlight"><pre class="highlight"><code><table class="rouge-table"><tbody><tr><td class="rouge-gutter gl"><pre class="lineno">1
2
3
4
5
6
7
8
</pre></td><td class="rouge-code"><pre>┏━━━━━━━━━━━━━━━━┳━━━━━━━━━━━━━━━━━━━━━━━━━━━━━━━┳━━━━━━━━━━━━━━━━━━━━━━━━━━━━━━━┓
┃ label          ┃ title                         ┃ author                        ┃
┡━━━━━━━━━━━━━━━━╇━━━━━━━━━━━━━━━━━━━━━━━━━━━━━━━╇━━━━━━━━━━━━━━━━━━━━━━━━━━━━━━━┩
│ Battaglia2024  │ A general framework for       │ Battaglia, Stefano and        │
│                │ active space embedding        │ Rossmannek, Max and Rybkin,   │
│                │ methods: applications in      │ Vladimir V. and Tavernelli,   │
│                │ quantum computing             │ Ivano and Hutter, J{\"u}rg    │
└────────────────┴───────────────────────────────┴───────────────────────────────┘
</pre></td></tr></tbody></table></code></pre></div></div>

<h3 id="deletion-errors">Deletion errors</h3>

<p>Deletions work just like insertions above, but using <code class="language-plaintext highlighter-rouge">d</code> instead of <code class="language-plaintext highlighter-rouge">i</code>:</p>
<div class="language-bash highlighter-rouge"><div class="highlight"><pre class="highlight"><code><table class="rouge-table"><tbody><tr><td class="rouge-gutter gl"><pre class="lineno">1
</pre></td><td class="rouge-code"><pre>cobib list ++author <span class="s2">"(Rossmanneck){d&lt;2}"</span>
</pre></td></tr></tbody></table></code></pre></div></div>
<p>(This matches the entry just like in the previous example.)</p>

<h3 id="substitution-errors">Substitution errors</h3>

<p>The third kind of error are substitutions which are equivalent to the insertion
and removal of a character at the same location. You can specify their number
using <code class="language-plaintext highlighter-rouge">s</code>:</p>
<div class="language-bash highlighter-rouge"><div class="highlight"><pre class="highlight"><code><table class="rouge-table"><tbody><tr><td class="rouge-gutter gl"><pre class="lineno">1
</pre></td><td class="rouge-code"><pre>cobib list ++author <span class="s2">"(Maz){s&lt;2}"</span>
</pre></td></tr></tbody></table></code></pre></div></div>
<p>(This matches the entry just like in the previous example.)</p>

<h3 id="allowing-multiple-errors-types">Allowing multiple errors types</h3>

<p>You can even combine these errors types. Below we allow an insertion and
deletion to occur:</p>
<div class="language-bash highlighter-rouge"><div class="highlight"><pre class="highlight"><code><table class="rouge-table"><tbody><tr><td class="rouge-gutter gl"><pre class="lineno">1
</pre></td><td class="rouge-code"><pre>cobib list ++author <span class="s2">"(Rossmaneck){i&lt;2,d&lt;2}"</span>
</pre></td></tr></tbody></table></code></pre></div></div>
<p>(And again, this matches the entry just like in the previous example.)</p>

<h3 id="generic-errors">Generic errors</h3>

<p>Finally, you can allow any type of error (i.e. without specifying its type)
using <code class="language-plaintext highlighter-rouge">e</code>:</p>
<div class="language-bash highlighter-rouge"><div class="highlight"><pre class="highlight"><code><table class="rouge-table"><tbody><tr><td class="rouge-gutter gl"><pre class="lineno">1
</pre></td><td class="rouge-code"><pre>cobib list ++author <span class="s2">"(Rossmaneck){e&lt;3}"</span>
</pre></td></tr></tbody></table></code></pre></div></div>

<h2 id="the---fuzziness-command-line-option-or--z-for-short">The <code class="language-plaintext highlighter-rouge">--fuzziness</code> command-line option (or <code class="language-plaintext highlighter-rouge">-z</code> for short)</h2>

<p>Since writing these <code class="language-plaintext highlighter-rouge">regex</code> patterns can be a bit cumbersome, the <code class="language-plaintext highlighter-rouge">--fuzziness</code>
argument makes enabling fuzzy finding a lot easier. It is best explained using
an example:</p>
<div class="language-bash highlighter-rouge"><div class="highlight"><pre class="highlight"><code><table class="rouge-table"><tbody><tr><td class="rouge-gutter gl"><pre class="lineno">1
</pre></td><td class="rouge-code"><pre>cobib list <span class="nt">--fuzziness</span> 3 ++author <span class="s2">"Rossmaneck"</span>
</pre></td></tr></tbody></table></code></pre></div></div>
<p>This command is equivalent to the previous example. Here is what happens under
the hood:</p>
<ol>
  <li>the provided string gets wrapped in parentheses: <code class="language-plaintext highlighter-rouge">Rossmaneck -&gt; (Rossmaneck)</code></li>
  <li>the provided value of fuzziness gets used as the allowed number of
arbitrary errors: <code class="language-plaintext highlighter-rouge">{e&lt;3}</code></li>
  <li>the two parts get concatenated to form the final query: <code class="language-plaintext highlighter-rouge">(Rossmaneck){e&lt;3}</code></li>
</ol>

<p>You can also use <code class="language-plaintext highlighter-rouge">-z</code> as a short-hand instead of typing out <code class="language-plaintext highlighter-rouge">--fuzziness</code> every
time.</p>

<h2 id="setting-a-default---fuzziness-value">Setting a default <code class="language-plaintext highlighter-rouge">--fuzziness</code> value</h2>

<p>If you want to enable approximate string matching by default, you can do so by
including the following in your configuration file:</p>
<div class="language-python highlighter-rouge"><div class="highlight"><pre class="highlight"><code><table class="rouge-table"><tbody><tr><td class="rouge-gutter gl"><pre class="lineno">1
2
3
</pre></td><td class="rouge-code"><pre><span class="kn">from</span> <span class="n">cobib.config</span> <span class="kn">import</span> <span class="n">config</span>

<span class="n">config</span><span class="p">.</span><span class="n">commands</span><span class="p">.</span><span class="n">list_</span><span class="p">.</span><span class="n">fuzziness</span> <span class="o">=</span> <span class="mi">3</span>
</pre></td></tr></tbody></table></code></pre></div></div>

<p>And although we only used the <code class="language-plaintext highlighter-rouge">list</code> command in our examples above, the <code class="language-plaintext highlighter-rouge">search</code>
command provides the same features:</p>
<div class="language-python highlighter-rouge"><div class="highlight"><pre class="highlight"><code><table class="rouge-table"><tbody><tr><td class="rouge-gutter gl"><pre class="lineno">1
</pre></td><td class="rouge-code"><pre><span class="n">config</span><span class="p">.</span><span class="n">commands</span><span class="p">.</span><span class="n">search</span><span class="p">.</span><span class="n">fuzziness</span> <span class="o">=</span> <span class="mi">3</span>
</pre></td></tr></tbody></table></code></pre></div></div>

<p>Finally, you can always overwrite this default value with the command-line
option. For example, <code class="language-plaintext highlighter-rouge">--fuzziness 0</code> will disable fuzzy finding.</p>

<h1 id="dealing-with-latex-sequences">Dealing with LaTeX sequences</h1>

<p>Accounting for typos by fuzzy matching is nice, but it would require a large
threshold of <code class="language-plaintext highlighter-rouge">--fuzziness</code> to be able to deal with LaTeX sequences such as the
one found in our example: <code class="language-plaintext highlighter-rouge">J{\"u}rg</code>.</p>

<p>Instead, coBib v5.1.0 added another way to deal with LaTeX sequences: the
<code class="language-plaintext highlighter-rouge">--decode-latex</code> command-line option. Setting this will convert LaTeX code to
plain text using <code class="language-plaintext highlighter-rouge">pylatexenc</code>’s<sup id="fnref:4"><a href="#fn:4" class="footnote" rel="footnote" role="doc-noteref">4</a></sup> encoder.</p>

<p>Note, that this only works approximately and only for sequences which can
actually be rendered in plain text using Unicode characters.</p>

<p>This allows you to do the following:</p>
<div class="language-bash highlighter-rouge"><div class="highlight"><pre class="highlight"><code><table class="rouge-table"><tbody><tr><td class="rouge-gutter gl"><pre class="lineno">1
</pre></td><td class="rouge-code"><pre>cobib list <span class="nt">--decode-latex</span> ++author <span class="s2">"Jürg"</span>
</pre></td></tr></tbody></table></code></pre></div></div>
<p>which will again match our entry <code class="language-plaintext highlighter-rouge">Battaglia2024</code> shown above.</p>

<p>The same command-line setting is available for the <code class="language-plaintext highlighter-rouge">search</code> command (where it
even comes with the <code class="language-plaintext highlighter-rouge">-l</code> short-hand).</p>

<h2 id="configuring-the-default-of---decode-latex">Configuring the default of <code class="language-plaintext highlighter-rouge">--decode-latex</code></h2>

<p>Just like for the <code class="language-plaintext highlighter-rouge">--fuzziness</code> setting, you can also configure the default
value for the <code class="language-plaintext highlighter-rouge">--decode-latex</code> option:</p>
<div class="language-python highlighter-rouge"><div class="highlight"><pre class="highlight"><code><table class="rouge-table"><tbody><tr><td class="rouge-gutter gl"><pre class="lineno">1
2
</pre></td><td class="rouge-code"><pre><span class="n">config</span><span class="p">.</span><span class="n">commands</span><span class="p">.</span><span class="n">list_</span><span class="p">.</span><span class="n">decode_latex</span> <span class="o">=</span> <span class="bp">True</span>
<span class="n">config</span><span class="p">.</span><span class="n">commands</span><span class="p">.</span><span class="n">search</span><span class="p">.</span><span class="n">decode_latex</span> <span class="o">=</span> <span class="bp">True</span>
</pre></td></tr></tbody></table></code></pre></div></div>
<p>If you enable this setting, you can still overwrite it from the command-line
using the <code class="language-plaintext highlighter-rouge">--no-decode-latex</code> argument (or <code class="language-plaintext highlighter-rouge">-D</code> for the <code class="language-plaintext highlighter-rouge">search</code> command).</p>

<h1 id="dealing-with-unicode-characters">Dealing with Unicode characters</h1>

<p>We can take the concept of special character decoding one step further by also
leveraging <code class="language-plaintext highlighter-rouge">text-unidecode</code><sup id="fnref:5"><a href="#fn:5" class="footnote" rel="footnote" role="doc-noteref">5</a></sup> to convert Unicode characters into their
approximate ASCII version.</p>

<p>Pairing this with LaTeX decoding allows us to match our entry with an even
simpler query:</p>
<div class="language-bash highlighter-rouge"><div class="highlight"><pre class="highlight"><code><table class="rouge-table"><tbody><tr><td class="rouge-gutter gl"><pre class="lineno">1
</pre></td><td class="rouge-code"><pre>cobib list <span class="nt">--decode-latex</span> <span class="nt">--decode-unicode</span> ++author <span class="s2">"Jurg"</span>
</pre></td></tr></tbody></table></code></pre></div></div>

<p>And, once again, you can do the same within the <code class="language-plaintext highlighter-rouge">search</code> command (where it also
comes with the <code class="language-plaintext highlighter-rouge">-u</code> short-hand).</p>

<h2 id="configuring-the-default-of---decode-unicode">Configuring the default of <code class="language-plaintext highlighter-rouge">--decode-unicode</code></h2>

<p>Of course, you can also configure the defaults for these options:</p>
<div class="language-python highlighter-rouge"><div class="highlight"><pre class="highlight"><code><table class="rouge-table"><tbody><tr><td class="rouge-gutter gl"><pre class="lineno">1
2
</pre></td><td class="rouge-code"><pre><span class="n">config</span><span class="p">.</span><span class="n">commands</span><span class="p">.</span><span class="n">list_</span><span class="p">.</span><span class="n">decode_unicode</span> <span class="o">=</span> <span class="bp">True</span>
<span class="n">config</span><span class="p">.</span><span class="n">commands</span><span class="p">.</span><span class="n">search</span><span class="p">.</span><span class="n">decode_unicode</span> <span class="o">=</span> <span class="bp">True</span>
</pre></td></tr></tbody></table></code></pre></div></div>
<p>And you can overwrite the enabled settings using <code class="language-plaintext highlighter-rouge">--no-decode-unicode</code> (or <code class="language-plaintext highlighter-rouge">-U</code>
for the <code class="language-plaintext highlighter-rouge">search</code> command).</p>

<h1 id="fuzzy-search-highlights">
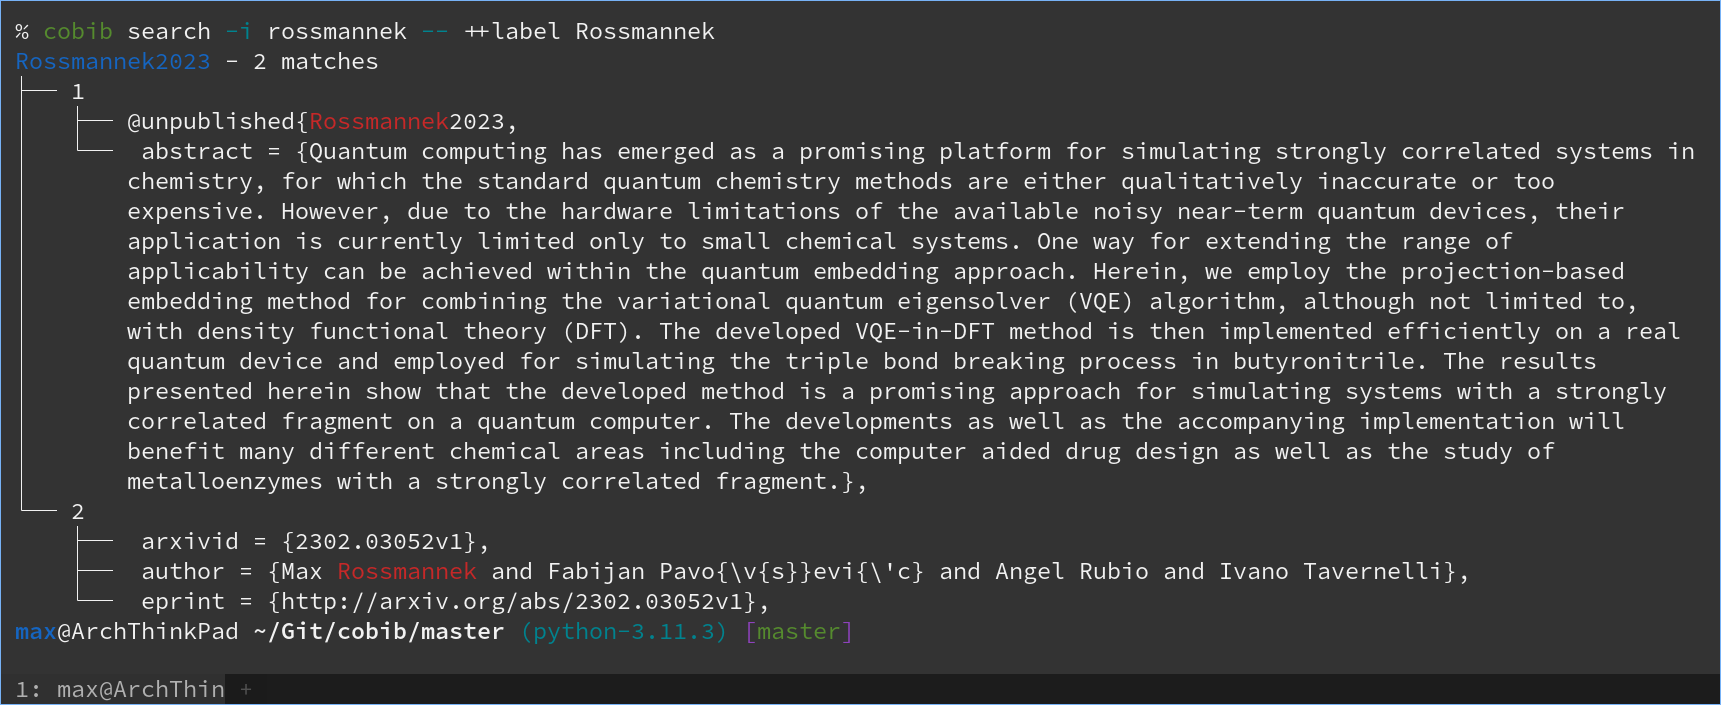
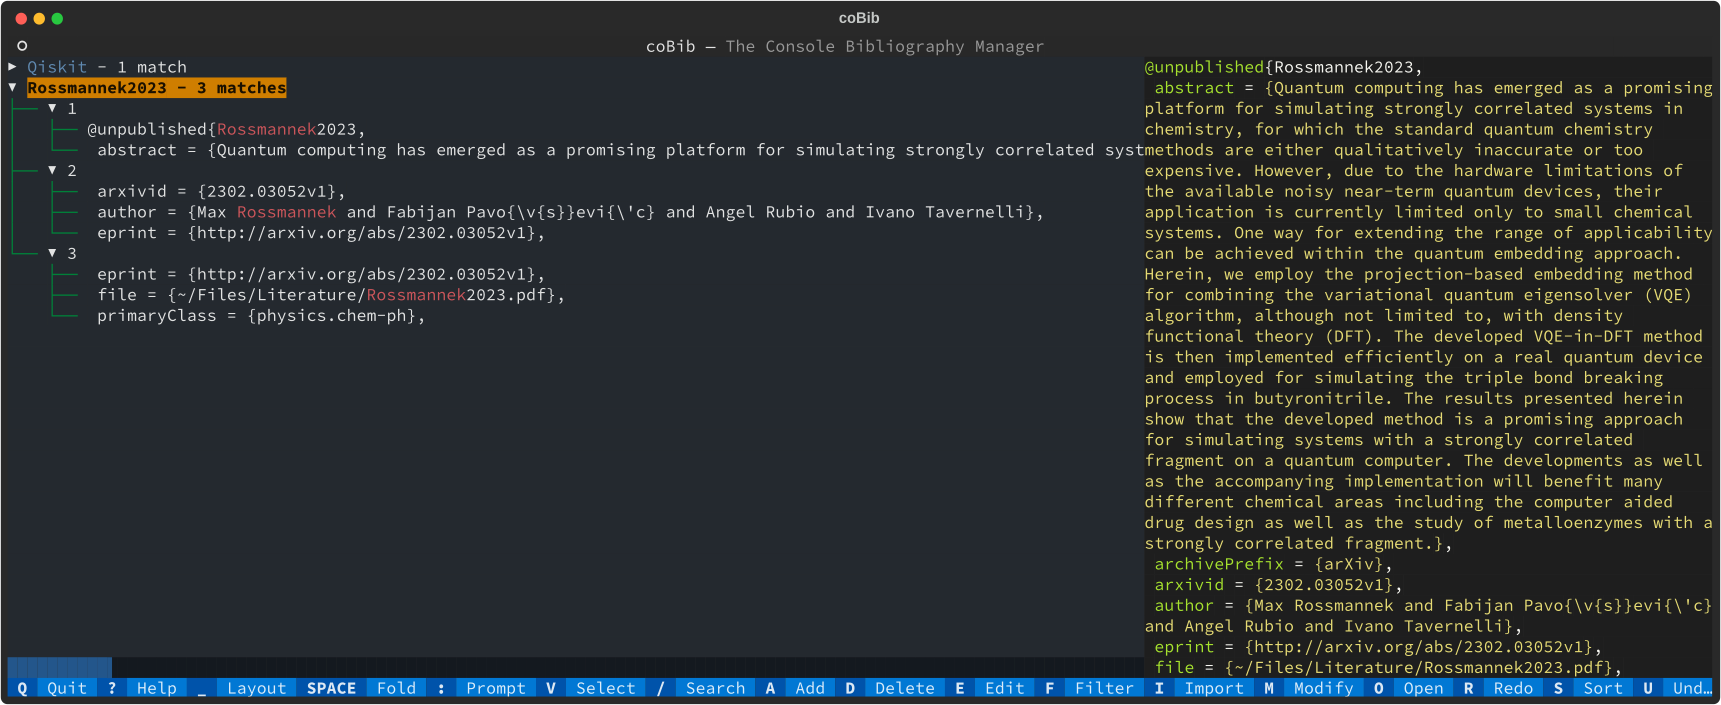
Fuzzy search highlights</h1>

<p>As a final little example, here you can see that even the highlighting of search
results works properly for fuzzy matches:</p>

<figure>
    <a href="/assets/images/cobib/v5.1_fuzzy_search.png"><img src="/assets/images/cobib/v5.1_fuzzy_search.png" /></a>
    <figcaption>Fuzzy search matches are highlighted properly.</figcaption>
</figure>

<div class="footnotes" role="doc-endnotes">
  <ol>
    <li id="fn:1">
      <p><a href="https://en.wikipedia.org/wiki/Approximate_string_matching">https://en.wikipedia.org/wiki/Approximate_string_matching</a> <a href="#fnref:1" class="reversefootnote" role="doc-backlink">&#8617;</a></p>
    </li>
    <li id="fn:2">
      <p><a href="https://pypi.org/project/regex/"> https://pypi.org/project/regex/</a> <a href="#fnref:2" class="reversefootnote" role="doc-backlink">&#8617;</a></p>
    </li>
    <li id="fn:3">
      <p><a href="https://docs.python.org/3/library/re.html"> https://docs.python.org/3/library/re.html</a> <a href="#fnref:3" class="reversefootnote" role="doc-backlink">&#8617;</a></p>
    </li>
    <li id="fn:4">
      <p><a href="https://pypi.org/project/pylatexenc/"> https://pypi.org/project/pylatexenc/</a> <a href="#fnref:4" class="reversefootnote" role="doc-backlink">&#8617;</a></p>
    </li>
    <li id="fn:5">
      <p><a href="https://pypi.org/project/text-unidecode/">https://pypi.org/project/text-unidecode/</a> <a href="#fnref:5" class="reversefootnote" role="doc-backlink">&#8617;</a></p>
    </li>
  </ol>
</div>]]></content><author><name>Max Rossmannek</name></author><category term="programming" /><category term="cobib" /><summary type="html"><![CDATA[A long-desired feature has just landed in coBib v5.1.0: the ability to fuzzy-find entries in the database! In this post I will briefly showcase this functionality and how it can make your life easier.]]></summary></entry><entry><title type="html">coBib goes Textualized!</title><link href="/programming/cobib-goes-textualized/" rel="alternate" type="text/html" title="coBib goes Textualized!" /><published>2023-05-20T00:00:00+00:00</published><updated>2023-05-20T00:00:00+00:00</updated><id>/programming/cobib-goes-textualized</id><content type="html" xml:base="/programming/cobib-goes-textualized/"><![CDATA[<p>January 13th, 2022 - this is the date of coBib’s last feature release (v3.5.0) as well as the date of the first few commits of
<a href="https://gitlab.com/cobib/cobib/-/merge_requests/51/">this merge request</a>.
So what has happened in the 492 days since then?</p>

<h2 id="the-short-answer-a-lot">The short answer: a LOT!</h2>

<p>Life in general, has been very busy. But I more or less steadily refactored coBib to integrate it with these two amazing projects by
<a href="https://www.textualize.io/">Textualize</a>: <a href="https://rich.readthedocs.io/en/stable/">rich</a> and <a href="https://textual.textualize.io/">textual</a>.
This means, coBib now has a shiny new interface in both, its CLI and TUI, and its code has become a lot more maintainable for the future to come!</p>

<p>If you are interested in finding out what this entails, continue reading.
If you simply want to see some screenshots, skim through the page as you like.</p>

<p>In any case: be sure to upgrade coBib now, to get v4.0.0 installed on your machine!</p>

<h2 id="the-longer-answer">The longer answer</h2>

<p>It all started when I first heard about <code class="language-plaintext highlighter-rouge">textual</code> - a then new project from the developer of <code class="language-plaintext highlighter-rouge">rich</code>, a “library for rich text and beautiful formatting
in the terminal”<sup id="fnref:1"><a href="#fn:1" class="footnote" rel="footnote" role="doc-noteref">1</a></sup>.
I had been keeping an eye on <code class="language-plaintext highlighter-rouge">rich</code> for a while as it would bring some nice benefits to coBib’s CLI, and when <code class="language-plaintext highlighter-rouge">textual</code> got announced, I knew that I
wanted to refactor the archaic ncurses-based TUI of coBib to become more modern and, especially, a much more maintainable codebase!</p>

<p>So even though <code class="language-plaintext highlighter-rouge">textual</code> was still in its infancy, the refactoring began…</p>

<h3 id="rich-integration">Rich integration</h3>

<p>I first set out to integrate <code class="language-plaintext highlighter-rouge">rich</code>. In doing so, I revisit the entire design of coBib’s command classes and also added a “porcelain” output mode for
easy parsing.
Without getting too much into the gory details, here are some screenshots to gorge yourself in:</p>

<figure>
    <a href="/assets/images/cobib/v4.0_cli_list.png"><img src="/assets/images/cobib/v4.0_cli_list.png" /></a>
    <figcaption>The <code>list</code> command now renders the database in a table format which can wrap columns individually.</figcaption>
</figure>

<figure>
    <a href="/assets/images/cobib/v4.0_cli_show.png"><img src="/assets/images/cobib/v4.0_cli_show.png" /></a>
    <figcaption>The <code>show</code> command now renders the entry with proper syntax highlighting.</figcaption>
</figure>

<figure>
    <a href="/assets/images/cobib/v4.0_cli_search.png"><img src="/assets/images/cobib/v4.0_cli_search.png" /></a>
    <figcaption>The <code>search</code> command now renders its results in a tree structure.</figcaption>
</figure>

<h3 id="textual-integration">Textual integration</h3>

<p>While the <code class="language-plaintext highlighter-rouge">rich</code> integration was done fairly early in the development cycle, integrating <code class="language-plaintext highlighter-rouge">textual</code> took a lot longer, in part also due to it being
alpha software with some features I needed simply not being available yet.
But it has matured a lot over the last year and I am happy to ship a nice new interface with coBib out today!</p>

<p>Here are some screenshots<sup id="fnref:2"><a href="#fn:2" class="footnote" rel="footnote" role="doc-noteref">2</a></sup>:</p>

<figure>
    <a href="/assets/images/cobib/v4.0_tui_list.png"><img src="/assets/images/cobib/v4.0_tui_list.png" /></a>
    <figcaption>The default look of the TUI. You can see your list of entries on the left as well as the current entry on the right.</figcaption>
</figure>

<figure>
    <a href="/assets/images/cobib/v4.0_tui_search.png"><img src="/assets/images/cobib/v4.0_tui_search.png" /></a>
    <figcaption>The interactively navigate-able tree structure of your search results. And you still get a preview of the current entry.</figcaption>
</figure>

<p>Functionally, the TUI still works almost exactly as before.
You might notice a few minor differences, some of which I plan to iron out in upcoming feature releases, but if you find anything missing or not
working, please feel free to <a href="https://gitlab.com/cobib/cobib/-/issues/new">open an issue</a>.</p>

<h2 id="other-noteworthy-changes">Other noteworthy changes</h2>

<p>Besides this major UI refactoring, I would like to briefly highlight two other noteworthy changes.</p>

<h3 id="configuration-changes">Configuration changes</h3>

<p>I refactored the configuration implementation as a Python <code class="language-plaintext highlighter-rouge">dataclass</code><sup id="fnref:3"><a href="#fn:3" class="footnote" rel="footnote" role="doc-noteref">3</a></sup>. This makes the code both, more maintainable and significantly easier to
<a href="https://cobib.gitlab.io/cobib/cobib/config/config.html">document online</a>.
However, this means if you used to do the following in your configuration file:</p>
<div class="language-python highlighter-rouge"><div class="highlight"><pre class="highlight"><code><table class="rouge-table"><tbody><tr><td class="rouge-gutter gl"><pre class="lineno">1
</pre></td><td class="rouge-code"><pre><span class="n">config</span><span class="p">[</span><span class="sh">"</span><span class="s">database</span><span class="sh">"</span><span class="p">][</span><span class="sh">"</span><span class="s">git</span><span class="sh">"</span><span class="p">]</span> <span class="o">=</span> <span class="bp">True</span>
</pre></td></tr></tbody></table></code></pre></div></div>
<p>You will now need to change this to the following:</p>
<div class="language-python highlighter-rouge"><div class="highlight"><pre class="highlight"><code><table class="rouge-table"><tbody><tr><td class="rouge-gutter gl"><pre class="lineno">1
</pre></td><td class="rouge-code"><pre><span class="n">config</span><span class="p">.</span><span class="n">database</span><span class="p">.</span><span class="n">git</span> <span class="o">=</span> <span class="bp">True</span>
</pre></td></tr></tbody></table></code></pre></div></div>

<p>Furthermore, as a consequence of the commands refactoring, a lot of the function signatures of the built-in events have changed. So be sure to update
those accordingly.</p>

<h3 id="label-disambiguation">Label disambiguation</h3>

<p>coBib used to be able to detect if an entry already existed in your database and would avoid re-adding it as a duplicate.
However, this functionality regressed when I added the label disambiguation feature.
With v4.0.0, you will now have the option to decide what to do interactively.
And to ease your choice, you will be presented with a side-by-side comparison of the existing and to-be-added entry!
Take a look at the screenshot below to see what you might expect from this:</p>

<figure>
    <a href="/assets/images/cobib/v4.0_cli_disambiguate.png"><img src="/assets/images/cobib/v4.0_cli_disambiguate.png" /></a>
    <figcaption>coBib will now ask you what to do, when encountering a label confict.</figcaption>
</figure>

<div class="footnotes" role="doc-endnotes">
  <ol>
    <li id="fn:1">
      <p><a href="https://github.com/textualize/rich">https://github.com/textualize/rich</a> <a href="#fnref:1" class="reversefootnote" role="doc-backlink">&#8617;</a></p>
    </li>
    <li id="fn:2">
      <p>These screenshots were generated directly with the help of textual: <code class="language-plaintext highlighter-rouge">textual run --screenshot 5 "src/cobib/__main__.py"</code> <a href="#fnref:2" class="reversefootnote" role="doc-backlink">&#8617;</a></p>
    </li>
    <li id="fn:3">
      <p><a href="https://docs.python.org/3/library/dataclasses.html">https://docs.python.org/3/library/dataclasses.html</a> <a href="#fnref:3" class="reversefootnote" role="doc-backlink">&#8617;</a></p>
    </li>
  </ol>
</div>]]></content><author><name>Max Rossmannek</name></author><category term="programming" /><category term="cobib" /><summary type="html"><![CDATA[January 13th, 2022 - this is the date of coBib’s last feature release (v3.5.0) as well as the date of the first few commits of this merge request. So what has happened in the 492 days since then?]]></summary></entry><entry><title type="html">coBibs Automatic File-Download and more…</title><link href="/programming/cobibs-automatic-file-download-and-more/" rel="alternate" type="text/html" title="coBibs Automatic File-Download and more…" /><published>2021-07-12T00:00:00+00:00</published><updated>2021-07-12T00:00:00+00:00</updated><id>/programming/cobibs-automatic-file-download-and-more</id><content type="html" xml:base="/programming/cobibs-automatic-file-download-and-more/"><![CDATA[<p>It has been a while since the last time that I wrote about <a href="https://gitlab.com/cobib/cobib">coBib</a> and several important features have since been included.
In this post, I will highlight the most important new features and walk you through how to configure and use them.</p>

<h2 id="automatic-file-download">Automatic File-Download</h2>

<p>Since version 3.2.0, coBib will attempt to download the PDF of a newly added entry automatically.
Out of the box, this feature will work for addition via arXiv IDs.
Support for arbitrary DOI entries needs to be configured by providing a dictionary of URL maps.
Other parsers do not provide this functionality, yet.
But for now, let us dive into a simple example…</p>

<h3 id="entries-added-via-arxiv-ids">Entries added via arXiv IDs</h3>
<p>Consider adding a new entry via an arXiv ID using the following command:</p>
<div class="language-sh highlighter-rouge"><div class="highlight"><pre class="highlight"><code><table class="rouge-table"><tbody><tr><td class="rouge-gutter gl"><pre class="lineno">1
</pre></td><td class="rouge-code"><pre>cobib add <span class="nt">--arxiv</span> 2009.10095
</pre></td></tr></tbody></table></code></pre></div></div>
<p>This will add the new entry <code class="language-plaintext highlighter-rouge">Egger2020</code> to your database.
Furthermore, it will automatically download the PDF version of this article and save it to <code class="language-plaintext highlighter-rouge">~/.local/share/cobib/Egger2020.pdf</code>.
You can follow the download progress on the command-line via the commands output:</p>
<div class="language-sh highlighter-rouge"><div class="highlight"><pre class="highlight"><code><table class="rouge-table"><tbody><tr><td class="rouge-gutter gl"><pre class="lineno">1
2
3
4
</pre></td><td class="rouge-code"><pre>Downloading: <span class="o">[================</span>                        <span class="o">]</span>   41.8%   1 MB / 2 MB
...
Downloading: <span class="o">[========================================]</span>  100.0%   2 MB / 2 MB
Successfully downloaded ~/.local/share/cobib/Egger2020.pdf
</pre></td></tr></tbody></table></code></pre></div></div>
<p>If you want to change the default download location, you can do so by overwriting the <code class="language-plaintext highlighter-rouge">config.utils.file_downloader.default_location</code> setting in your config file (read <a href="../cobibs-new-configuration">this blogpost</a> for more information on coBibs Python configuration system).</p>

<h3 id="entries-added-via-dois">Entries added via DOIs</h3>
<p>Now, let us turn towards downloading DOI entries.
The reason why this case is more difficult, is that a DOI can resolve to a landing page of any Journal.
Thus, there is no single recipe to determine the link to the articles PDF file.</p>

<p>To circumvent this problem, the user needs to manually specify a dictionary of URL mappings in the <code class="language-plaintext highlighter-rouge">config.utils.file_downloader.url_map</code> setting.
The key-value pairs of this dictionary should be formatted similar to this example:</p>
<div class="language-python highlighter-rouge"><div class="highlight"><pre class="highlight"><code><table class="rouge-table"><tbody><tr><td class="rouge-gutter gl"><pre class="lineno">1
2
3
</pre></td><td class="rouge-code"><pre><span class="n">config</span><span class="p">.</span><span class="n">utils</span><span class="p">.</span><span class="n">file_downloader</span><span class="p">.</span><span class="n">url_map</span><span class="p">[</span>
    <span class="sa">r</span><span class="sh">"</span><span class="s">(.+)://quantum-journal.org/papers/([^/]+)</span><span class="sh">"</span>
<span class="p">]</span> <span class="o">=</span> <span class="sa">r</span><span class="sh">"</span><span class="s">\1://quantum-journal.org/papers/\2/pdf/</span><span class="sh">"</span>
</pre></td></tr></tbody></table></code></pre></div></div>
<p>Let us walk through this snippet to understand what it does:</p>
<ol>
  <li>The key <code class="language-plaintext highlighter-rouge">r"(.+)://quantum-journal.org/papers/([^/]+)"</code> is a raw Python-string containing a <a href="https://docs.python.org/3/howto/regex.html">regex pattern</a>.
This pattern is made up of the following parts:
    <ul>
      <li><code class="language-plaintext highlighter-rouge">(.+)://</code>: this matches any file protocol (e.g. <code class="language-plaintext highlighter-rouge">http://</code> or <code class="language-plaintext highlighter-rouge">https://</code>) and captures the string preceding <code class="language-plaintext highlighter-rouge">://</code>.</li>
      <li><code class="language-plaintext highlighter-rouge">quantum-journal.org/papers/</code>: this is the main body of the URL and will be matched as plain text.</li>
      <li><code class="language-plaintext highlighter-rouge">([^/]+)</code>: this is another regex capture matching any characters <em>other than <code class="language-plaintext highlighter-rouge">/</code></em>.</li>
    </ul>
  </li>
  <li>The value of this entry, <code class="language-plaintext highlighter-rouge">r"\1://quantum-journal.org/papers/\2/pdf/"</code>, is also a regex pattern which is used as a substitution pattern.
The placeholders <code class="language-plaintext highlighter-rouge">\1</code> and <code class="language-plaintext highlighter-rouge">\2</code> will be replaced by the first and second captured string, respectively.</li>
</ol>

<p>Here is a concrete example; when adding a new entry from a DOI via:</p>
<div class="language-sh highlighter-rouge"><div class="highlight"><pre class="highlight"><code><table class="rouge-table"><tbody><tr><td class="rouge-gutter gl"><pre class="lineno">1
</pre></td><td class="rouge-code"><pre>cobib add <span class="nt">--doi</span> 10.22331/q-2021-06-17-479
</pre></td></tr></tbody></table></code></pre></div></div>
<p>, the URL of the Journals landing page will resolve to <code class="language-plaintext highlighter-rouge">https://quantum-journal.org/papers/q-2021-06-17-479/</code>.
This URL matches the <em>key</em> which we discussed above:</p>
<div class="language-plaintext highlighter-rouge"><div class="highlight"><pre class="highlight"><code><table class="rouge-table"><tbody><tr><td class="rouge-gutter gl"><pre class="lineno">1
2
3
</pre></td><td class="rouge-code"><pre>https://quantum-journal.org/papers/q-2021-06-17-479/
vvvvv                              vvvvvvvvvvvvvvvv
(.+) ://quantum-journal.org/papers/([^/]+)         /
</pre></td></tr></tbody></table></code></pre></div></div>
<p>Thus, after inserting the captured groups into the <em>value</em> pattern, we obtain the URL:</p>
<div class="language-plaintext highlighter-rouge"><div class="highlight"><pre class="highlight"><code><table class="rouge-table"><tbody><tr><td class="rouge-gutter gl"><pre class="lineno">1
2
3
</pre></td><td class="rouge-code"><pre>\1   ://quantum-journal.org/papers/\2              /pdf/
^^^^^                              ^^^^^^^^^^^^^^^^
https://quantum-journal.org/papers/q-2021-06-17-479/pdf/
</pre></td></tr></tbody></table></code></pre></div></div>
<p>, which is the correct URL pointing to the PDF version of this article.</p>

<p>As you can see, this recipe allows you to map from any Journals landing page to the URL pointing to the articles PDF.
However, figuring out the correct regex pattern can be difficult at times.
I am planning to collect a list of working patterns on <a href="https://gitlab.com/cobib/cobib/-/wikis/Journal-Abbreviations">coBibs Wiki</a> in the future and encourage everyone to add their patterns for the benefit of everybody else.</p>

<h2 id="improvements-to-the-modify-command">Improvements to the <code class="language-plaintext highlighter-rouge">modify</code> Command</h2>

<p>Two important changes have been made to how the filtering of the <code class="language-plaintext highlighter-rouge">list</code> command and the modifications of the <code class="language-plaintext highlighter-rouge">modify</code> command are interpreted:</p>
<ol>
  <li><strong>Filter values are now interpreted as regex patterns</strong> (which we already looked at above):
This means you can perform more advanced filtering in a similar way to how you can <em>search</em> through your database for regex patterns.
Here is a simple example:
    <div class="language-sh highlighter-rouge"><div class="highlight"><pre class="highlight"><code><table class="rouge-table"><tbody><tr><td class="rouge-gutter gl"><pre class="lineno">1
</pre></td><td class="rouge-code"><pre> cobib list ++label <span class="s2">"</span><span class="se">\D</span><span class="s2">+_</span><span class="se">\d</span><span class="s2">+"</span>
</pre></td></tr></tbody></table></code></pre></div>    </div>
    <p>This will list all entries with a label matching the regex pattern <code class="language-plaintext highlighter-rouge">\D+_\d+</code>.
In words, this pattern will match any label which starts with multiple non-digit characters, followed by an underscore and ends with multiple digits.
This is a common label format used by many Journals, e.g. <code class="language-plaintext highlighter-rouge">Rossmannek_2021</code>.</p>
  </li>
  <li><strong>Modifications get evaluated as <a href="https://docs.python.org/3/reference/lexical_analysis.html#f-strings">f-strings</a></strong>:
These kind of strings are a powerful feature of the Python language and allow you to use variables which will be interpreted literally.
Within coBibs scope that means you can use any field name of your entry as a variable which will be replaced by its value in the current entry.
Take an example again:
    <div class="language-sh highlighter-rouge"><div class="highlight"><pre class="highlight"><code><table class="rouge-table"><tbody><tr><td class="rouge-gutter gl"><pre class="lineno">1
</pre></td><td class="rouge-code"><pre> cobib modify <span class="s2">"pages:{pages.replace('--', '-')}"</span> <span class="nt">--</span> ...
</pre></td></tr></tbody></table></code></pre></div>    </div>
    <p>In this example, the <code class="language-plaintext highlighter-rouge">pages</code> field is modified in such a way, that the occurrence of the string, <code class="language-plaintext highlighter-rouge">--</code>, gets replaced by a single dash, <code class="language-plaintext highlighter-rouge">-</code>.
This showcases well, how having the fields available as proper variables allows you to perform advanced modifications which could otherwise be a long and manual editing task.</p>
  </li>
</ol>

<p>Finally, combining these two features, allows you to perform even more powerful modifications to your database.
My favorite example is the following:</p>
<div class="language-sh highlighter-rouge"><div class="highlight"><pre class="highlight"><code><table class="rouge-table"><tbody><tr><td class="rouge-gutter gl"><pre class="lineno">1
</pre></td><td class="rouge-code"><pre>cobib modify <span class="s2">"label:{label.replace('_', '')}"</span> <span class="nt">--</span> ++label <span class="s2">"</span><span class="se">\D</span><span class="s2">+_</span><span class="se">\d</span><span class="s2">+"</span>
</pre></td></tr></tbody></table></code></pre></div></div>
<p>This combines our previous two examples into one, renaming all entries which follow the naming pattern <code class="language-plaintext highlighter-rouge">&lt;string&gt;_&lt;number&gt;</code> (typically referring to <code class="language-plaintext highlighter-rouge">&lt;author&gt;_&lt;year&gt;</code>, e.g. <code class="language-plaintext highlighter-rouge">Rossmannek_2021</code>) to follow the pattern <code class="language-plaintext highlighter-rouge">&lt;string&gt;&lt;number&gt;</code> (e.g. <code class="language-plaintext highlighter-rouge">Rossmannek2021</code>).</p>

<p>I consider this a killer feature of coBib making it standout against other bibliography-management tools out there.</p>

<h2 id="journal-abbreviations">Journal Abbreviations</h2>

<p>In version 3.2.0, I also added the new Journal Abbreviations.
With these, the <code class="language-plaintext highlighter-rouge">export</code> command can be used to automatically convert the <code class="language-plaintext highlighter-rouge">journal</code> fields of all entries to their abbreviated version.
This is a useful functionality to ensure compliance with Journal requirements for BibTeX citation styles.</p>

<p>In order to use this feature, you must configure a list of abbreviations in the <code class="language-plaintext highlighter-rouge">config.utils.journal_abbreviations</code> setting.
As an example, consider this snippet:</p>
<div class="language-python highlighter-rouge"><div class="highlight"><pre class="highlight"><code><table class="rouge-table"><tbody><tr><td class="rouge-gutter gl"><pre class="lineno">1
</pre></td><td class="rouge-code"><pre><span class="n">config</span><span class="p">.</span><span class="n">utils</span><span class="p">.</span><span class="n">journal_abbreviations</span> <span class="o">+=</span> <span class="p">[(</span><span class="sh">"</span><span class="s">Annalen der Physik</span><span class="sh">"</span><span class="p">,</span> <span class="sh">"</span><span class="s">Ann. Phys.</span><span class="sh">"</span><span class="p">)]</span>
</pre></td></tr></tbody></table></code></pre></div></div>
<p>Here, we are adding a new Journal Abbreviation for the “Annalen der Physik” journal, whose short-hand name is “Ann. Phys.”.
Note, that we include the punctuation as part of the abbreviation which can be easily removed during exporting, if necessary.</p>

<p>Now, let us look at this example in action!
Since we are only interested in the <code class="language-plaintext highlighter-rouge">journal</code> field, I will keep the entry to a bare minimum:</p>
<div class="language-yaml highlighter-rouge"><div class="highlight"><pre class="highlight"><code><table class="rouge-table"><tbody><tr><td class="rouge-gutter gl"><pre class="lineno">1
2
3
4
5
</pre></td><td class="rouge-code"><pre><span class="nn">---</span>
<span class="na">einstein</span><span class="pi">:</span>
  <span class="na">ENTRYTYPE</span><span class="pi">:</span> <span class="s">article</span>
  <span class="na">journal</span><span class="pi">:</span> <span class="s">Annalen der Physik</span>
<span class="nn">...</span>
</pre></td></tr></tbody></table></code></pre></div></div>

<p>We can export it in three different ways to a BibTeX file:</p>
<ol>
  <li><code class="language-plaintext highlighter-rouge">cobib export -b einstein.bib -s -- einstein</code>
    <div class="language-bibtex highlighter-rouge"><div class="highlight"><pre class="highlight"><code><table class="rouge-table"><tbody><tr><td class="rouge-gutter gl"><pre class="lineno">1
2
3
</pre></td><td class="rouge-code"><pre><span class="nc">@article</span><span class="p">{</span><span class="nl">einstein</span><span class="p">,</span>
 <span class="na">journal</span> <span class="p">=</span> <span class="s">{Annalen der Physik}</span><span class="p">,</span>
<span class="p">}</span>
</pre></td></tr></tbody></table></code></pre></div>    </div>
    <p>This is the normal <code class="language-plaintext highlighter-rouge">export</code> command, which leaves the Journal name unchanged.</p>
  </li>
  <li><code class="language-plaintext highlighter-rouge">cobib export --abbreviate -b einstein.bib -s -- einstein</code>
    <div class="language-bibtex highlighter-rouge"><div class="highlight"><pre class="highlight"><code><table class="rouge-table"><tbody><tr><td class="rouge-gutter gl"><pre class="lineno">1
2
3
</pre></td><td class="rouge-code"><pre><span class="nc">@article</span><span class="p">{</span><span class="nl">einstein</span><span class="p">,</span>
 <span class="na">journal</span> <span class="p">=</span> <span class="s">{Ann. Phys.}</span><span class="p">,</span>
<span class="p">}</span>
</pre></td></tr></tbody></table></code></pre></div>    </div>
    <p>By specifying the <code class="language-plaintext highlighter-rouge">--abbreviate</code> argument, the Journal name gets replaced with our configured abbreviation.</p>
  </li>
  <li><code class="language-plaintext highlighter-rouge">cobib export --abbreviate --dotless -b einstein.bib -s -- einstein</code>
    <div class="language-bibtex highlighter-rouge"><div class="highlight"><pre class="highlight"><code><table class="rouge-table"><tbody><tr><td class="rouge-gutter gl"><pre class="lineno">1
2
3
</pre></td><td class="rouge-code"><pre><span class="nc">@article</span><span class="p">{</span><span class="nl">einstein</span><span class="p">,</span>
 <span class="na">journal</span> <span class="p">=</span> <span class="s">{Ann Phys}</span><span class="p">,</span>
<span class="p">}</span>
</pre></td></tr></tbody></table></code></pre></div>    </div>
    <p>Finally, by adding the <code class="language-plaintext highlighter-rouge">--dotless</code> argument, we can even remove the punctuation from the abbreviated name.</p>
  </li>
</ol>

<p>coBib will attempt to always store the full Journal name when adding new entries, and will automatically elongate an abbreviated name when encountering it during the <code class="language-plaintext highlighter-rouge">add</code> command.
It will warn you about entries where it fails to elongate or abbreviate Journal names, so you can gradually grow your list of Journal abbreviations.</p>

<h2 id="database-format-linter">Database Format Linter</h2>

<blockquote>
  <p>:scroll: A <a href="https://en.wikipedia.org/wiki/Lint_(software)">Linter</a> is a static code analysis tool which can check for stylistic/formatting errors (among other things).</p>
</blockquote>

<p>Last but not least, I want to showcase the new <code class="language-plaintext highlighter-rouge">_lint_database</code> shell utility added as part of version 3.1.0.
It can detect possible shortcomings in your database file formatting.
This allows you to keep up-to-date with the latest improvements to coBibs database formatting, including newly supported features like proper number-support for numeric fields and list-support for fields like <code class="language-plaintext highlighter-rouge">file</code>, <code class="language-plaintext highlighter-rouge">url</code> and <code class="language-plaintext highlighter-rouge">tags</code>.</p>

<p>Here is an example database file with several shortcomings:</p>
<div class="language-yaml highlighter-rouge"><div class="highlight"><pre class="highlight"><code><table class="rouge-table"><tbody><tr><td class="rouge-gutter gl"><pre class="lineno">1
2
3
4
5
6
7
8
9
10
11
12
13
14
15
</pre></td><td class="rouge-code"><pre><span class="nn">---</span>
<span class="na">einstein</span><span class="pi">:</span>
  <span class="na">ENTRYTYPE</span><span class="pi">:</span> <span class="s">article</span>
  <span class="na">ID</span><span class="pi">:</span> <span class="s">einstein</span>
  <span class="na">author</span><span class="pi">:</span> <span class="s">Albert Einstein</span>
  <span class="na">doi</span><span class="pi">:</span> <span class="s">10.1002/andp.19053221004</span>
  <span class="na">journal</span><span class="pi">:</span> <span class="s">Annalen der Physik</span>
  <span class="na">month</span><span class="pi">:</span> <span class="s">June</span>
  <span class="na">number</span><span class="pi">:</span> <span class="s2">"</span><span class="s">10"</span>
  <span class="na">pages</span><span class="pi">:</span> <span class="s">891--921</span>
  <span class="na">title</span><span class="pi">:</span> <span class="s">Zur Elektrodynamik bewegter K{\"o}rper</span>
  <span class="na">url</span><span class="pi">:</span> <span class="s">http://dx.doi.org/10.1002/andp.19053221004, https://onlinelibrary.wiley.com/doi/epdf/10.1002/andp.19053221004</span>
  <span class="na">volume</span><span class="pi">:</span> <span class="s2">"</span><span class="s">322"</span>
  <span class="na">year</span><span class="pi">:</span> <span class="s2">"</span><span class="s">1905"</span>
<span class="nn">...</span>
</pre></td></tr></tbody></table></code></pre></div></div>
<p>You can find the points for improvement by running <code class="language-plaintext highlighter-rouge">cobib _lint_database</code> in the terminal.
For this example, you will obtain the following output:</p>
<div class="language-sh highlighter-rouge"><div class="highlight"><pre class="highlight"><code><table class="rouge-table"><tbody><tr><td class="rouge-gutter gl"><pre class="lineno">1
2
3
4
5
6
</pre></td><td class="rouge-code"><pre>literature.yaml:8 Converting field <span class="s1">'month'</span> of entry <span class="s1">'einstein'</span> from <span class="s1">'June'</span> to <span class="s1">'jun'</span><span class="nb">.</span>
literature.yaml:9 Converting field <span class="s1">'number'</span> of entry <span class="s1">'einstein'</span> to integer: 10.
literature.yaml:12 Converted the field <span class="s1">'url'</span> of entry <span class="s1">'einstein'</span> to a list. You can consider storing it as such directly.
literature.yaml:13 Converting field <span class="s1">'volume'</span> of entry <span class="s1">'einstein'</span> to integer: 322.
literature.yaml:14 Converting field <span class="s1">'year'</span> of entry <span class="s1">'einstein'</span> to integer: 1905.
literature.yaml:4 The field <span class="s1">'ID'</span> of entry <span class="s1">'einstein'</span> is no longer required. It will be inferred from the entry label.
</pre></td></tr></tbody></table></code></pre></div></div>
<p>As you can see, this command produces lint messages in the format: <code class="language-plaintext highlighter-rouge">&lt;database path&gt;:&lt;line number&gt; &lt;message&gt;</code>.
You can go through these messages one by one and change your database file as suggested.
For example:</p>

<ol>
  <li><code class="language-plaintext highlighter-rouge">literature.yaml:8 Converting field 'month' of entry 'einstein' from 'June' to 'jun'.</code>:
  As of version 3.1.0 coBib always stores the <code class="language-plaintext highlighter-rouge">month</code> field as a three-letter code, which ensures that macros from most common BibTeX citation styles will work correctly.
    <div class="language-yaml highlighter-rouge"><div class="highlight"><pre class="highlight"><code><table class="rouge-table"><tbody><tr><td class="rouge-gutter gl"><pre class="lineno">1
</pre></td><td class="rouge-code"><pre>  <span class="na">month</span><span class="pi">:</span> <span class="s">jun</span>
</pre></td></tr></tbody></table></code></pre></div>    </div>
  </li>
  <li><code class="language-plaintext highlighter-rouge">literature.yaml:9 Converting field 'number' of entry 'einstein' to integer: 10.</code>:
Numeric fields are now supported as well, which means that you can properly express numbers as such (and not as strings):
    <div class="language-yaml highlighter-rouge"><div class="highlight"><pre class="highlight"><code><table class="rouge-table"><tbody><tr><td class="rouge-gutter gl"><pre class="lineno">1
2
3
</pre></td><td class="rouge-code"><pre>   <span class="na">number</span><span class="pi">:</span> <span class="m">10</span>
   <span class="na">volume</span><span class="pi">:</span> <span class="m">322</span>
   <span class="na">year</span><span class="pi">:</span> <span class="m">1905</span>
</pre></td></tr></tbody></table></code></pre></div>    </div>
  </li>
  <li><code class="language-plaintext highlighter-rouge">literature.yaml:12 Converted the field 'url' of entry 'einstein' to a list. You can consider storing it as such directly.</code>:
  coBib can also handle YAML lists properly which greatly improves the readability of the fields <code class="language-plaintext highlighter-rouge">file</code>, <code class="language-plaintext highlighter-rouge">url</code> and <code class="language-plaintext highlighter-rouge">tags</code>:
    <div class="language-yaml highlighter-rouge"><div class="highlight"><pre class="highlight"><code><table class="rouge-table"><tbody><tr><td class="rouge-gutter gl"><pre class="lineno">1
2
3
</pre></td><td class="rouge-code"><pre>   <span class="na">url</span><span class="pi">:</span>
     <span class="pi">-</span> <span class="s">http://dx.doi.org/10.1002/andp.19053221004</span>
     <span class="pi">-</span> <span class="s">https://onlinelibrary.wiley.com/doi/epdf/10.1002/andp.19053221004</span>
</pre></td></tr></tbody></table></code></pre></div>    </div>
  </li>
  <li><code class="language-plaintext highlighter-rouge">literature.yaml:4 The field 'ID' of entry 'einstein' is no longer required. It will be inferred from the entry label.</code>:
  Finally, coBib also no longer requires the redundant <code class="language-plaintext highlighter-rouge">ID</code> field and correctly infers this information from the label.
  Thus, you can safely remove these lines from your database.</li>
</ol>

<p>In the end, the above database file could look like this:</p>
<div class="language-yaml highlighter-rouge"><div class="highlight"><pre class="highlight"><code><table class="rouge-table"><tbody><tr><td class="rouge-gutter gl"><pre class="lineno">1
2
3
4
5
6
7
8
9
10
11
12
13
14
15
16
</pre></td><td class="rouge-code"><pre><span class="nn">---</span>
<span class="na">einstein</span><span class="pi">:</span>
  <span class="na">ENTRYTYPE</span><span class="pi">:</span> <span class="s">article</span>
  <span class="na">author</span><span class="pi">:</span> <span class="s">Albert Einstein</span>
  <span class="na">doi</span><span class="pi">:</span> <span class="s">10.1002/andp.19053221004</span>
  <span class="na">journal</span><span class="pi">:</span> <span class="s">Annalen der Physik</span>
  <span class="na">month</span><span class="pi">:</span> <span class="s">jun</span>
  <span class="na">number</span><span class="pi">:</span> <span class="m">10</span>
  <span class="na">pages</span><span class="pi">:</span> <span class="s">891--921</span>
  <span class="na">title</span><span class="pi">:</span> <span class="s">Zur Elektrodynamik bewegter K{\"o}rper</span>
  <span class="na">url</span><span class="pi">:</span>
    <span class="pi">-</span> <span class="s">http://dx.doi.org/10.1002/andp.19053221004</span>
    <span class="pi">-</span> <span class="s">https://onlinelibrary.wiley.com/doi/epdf/10.1002/andp.19053221004</span>
  <span class="na">volume</span><span class="pi">:</span> <span class="m">322</span>
  <span class="na">year</span><span class="pi">:</span> <span class="m">1905</span>
<span class="nn">...</span>
</pre></td></tr></tbody></table></code></pre></div></div>

<p>I am planning to add a utility to automatically resolve lint warnings in the future, so stay tuned for that! :rocket:</p>

<h2 id="online-documentation">Online documentation</h2>

<p>I would like to leave with a final word on the new online documentation of coBib which is now hosted at <a href="https://cobib.gitlab.io/cobib/cobib.html">https://cobib.gitlab.io/cobib/cobib.html</a>.
I hope that it may serve you as a useful resource in addition to coBibs manual page :nerd_face:</p>]]></content><author><name>Max Rossmannek</name></author><category term="programming" /><category term="cobib" /><summary type="html"><![CDATA[It has been a while since the last time that I wrote about coBib and several important features have since been included. In this post, I will highlight the most important new features and walk you through how to configure and use them.]]></summary></entry><entry><title type="html">coBib’s New Configuration</title><link href="/programming/cobibs-new-configuration/" rel="alternate" type="text/html" title="coBib’s New Configuration" /><published>2021-01-17T00:00:00+00:00</published><updated>2021-01-17T00:00:00+00:00</updated><id>/programming/cobibs-new-configuration</id><content type="html" xml:base="/programming/cobibs-new-configuration/"><![CDATA[<p><a href="https://gitlab.com/cobib/cobib">coBib</a> is getting a new configuration system with the next major release, <a href="https://gitlab.com/cobib/cobib/-/milestones/3">version 3.0</a>!
Although this release is by no means ready, I am already introducing the new configuration to build some other new features (which will also be part of v3.0) on top of it.
This means, if you are following coBib’s development branch, you will soon be presented with a warning when using coBib stating that the old <code class="language-plaintext highlighter-rouge">INI</code>-style configuration is deprecated and a new Python-based one takes its place.</p>

<p>In this short post I will go over some of the reasons why I chose to re-design the configuration mechanism and provide you detailed instructions on how to migrate from the old <code class="language-plaintext highlighter-rouge">INI</code>-style configuration.</p>

<h2 id="why-use-a-python-based-configuration">Why use a Python-based configuration?</h2>

<p>A configuration written in Python provides the user with the greatest flexibility to customize a program which is written in Python.
Obviously, this power comes with responsibility, too.
In theory, a user could <a href="https://en.wikipedia.org/wiki/Monkey_patch">monkey-patch</a> the code to an almost uncontrollable degree, so care just be taken not to copy code into your configuration which you do not understand.
Nonetheless, if the user is aware of this responsibility, the power which a Python-based configuration brings to the table is too great of an opportunity to miss out on for coBib.</p>

<p>When re-designing the configuration module I was looking for inspiration in the code of other Python-configured programs which I use myself, too.
Namely, <a href="http://www.qtile.org/">qtile</a> and <a href="https://qutebrowser.org/">qutebrowser</a> were the two codes which I was mainly looking into.
However, I found that both of them (being much larger codes than coBib) had added a lot of code for the configuration parsing which I did not seem to require.
Thus, in the end, I ended up with an implementation much different to either of their approaches.</p>

<p>I am not going to go into the details of how I implemented coBib’s new configuration but it essentially boils down to creating a <a href="https://docs.python.org/3/library/importlib.html#importlib.machinery.ModuleSpec"><code class="language-plaintext highlighter-rouge">ModuleSpec</code></a> from the location of the configuration file using <a href="https://docs.python.org/3/library/importlib.html#importlib.util.spec_from_file_location"><code class="language-plaintext highlighter-rouge">importlib.util</code></a>.
I then combined this functionality with an easy-to-use extension of Python’s <code class="language-plaintext highlighter-rouge">dict</code> class which allows recursive setting of items via attributes.
(See also <a href="https://stackoverflow.com/questions/3031219/recursively-access-dict-via-attributes-as-well-as-index-access/3031270#3031270">this</a> Stackoverflow answer.)</p>

<h2 id="how-to-migrate-my-existing-configuration">How to migrate my existing configuration?</h2>

<p>Let me now focus on how you can convert your existing <code class="language-plaintext highlighter-rouge">INI</code>-style configuration into a new Python-based one.</p>

<blockquote>
  <p>:scroll: A short note before we get started:
if you do not have an existing configuration, yet, the easiest way to get you started is to copy the well-documented example configuration to the default location and start adapting it to your needs.
You can do so with the following command:
<code class="language-plaintext highlighter-rouge">cobib _example_config &gt; ~/.config/cobib/config.py</code></p>
</blockquote>

<p>However, if you do have an existing configuration it is probably easier to continue reading and migrate it manually.</p>

<p>To get started, open the file <code class="language-plaintext highlighter-rouge">~/.config/cobib/config.py</code> in your text editor of choice.
At the top of the file, you have to <em>import</em> coBib’s configuration object:</p>
<div class="language-python highlighter-rouge"><div class="highlight"><pre class="highlight"><code><table class="rouge-table"><tbody><tr><td class="rouge-gutter gl"><pre class="lineno">1
</pre></td><td class="rouge-code"><pre><span class="kn">from</span> <span class="n">cobib.config</span> <span class="kn">import</span> <span class="n">config</span>
</pre></td></tr></tbody></table></code></pre></div></div>
<p>If you are wondering how you can import coBib’s configuration now, before you have written it, you can think of this step as loading the default configuration which you are now free to adapt to your liking.</p>

<p>In the rest of the file, you can now set the configuration options.
As mentioned before, coBib’s <code class="language-plaintext highlighter-rouge">config</code> object is an extension of a <code class="language-plaintext highlighter-rouge">dict</code> object.
Thus, the following two statements are equivalent:</p>
<div class="language-python highlighter-rouge"><div class="highlight"><pre class="highlight"><code><table class="rouge-table"><tbody><tr><td class="rouge-gutter gl"><pre class="lineno">1
2
</pre></td><td class="rouge-code"><pre><span class="n">config</span><span class="p">[</span><span class="sh">'</span><span class="s">database</span><span class="sh">'</span><span class="p">][</span><span class="sh">'</span><span class="s">git</span><span class="sh">'</span><span class="p">]</span> <span class="o">=</span> <span class="bp">True</span>
<span class="n">config</span><span class="p">.</span><span class="n">database</span><span class="p">.</span><span class="n">git</span> <span class="o">=</span> <span class="bp">True</span>
</pre></td></tr></tbody></table></code></pre></div></div>
<p>I personally find the latter to be more convenient for this particular use-case which is why I have added this <em>attribute</em>-setter capability.</p>

<p>If you want to find out what settings exist you can check out coBib’s man-page (<code class="language-plaintext highlighter-rouge">man cobib</code>) or the example configuration <code class="language-plaintext highlighter-rouge">cobib _example_config</code>).
Before I leave you to it, you should know that coBib will validate your configuration before using it.
Thus, if you experience an error be sure to read the output as it will likely tell you which setting is causing a problem (e.g. an invalid type).</p>

<p>Finally, here is a comparison of the old and new settings.
As you will see, some of the settings have been renamed/moved (these are highlighted in <strong>bold</strong>).</p>

<table>
  <thead>
    <tr>
      <th><strong>Old</strong></th>
      <th><strong>New</strong></th>
    </tr>
  </thead>
  <tbody>
    <tr>
      <td>DATABASE.file</td>
      <td>config.database.file</td>
    </tr>
    <tr>
      <td>DATABASE.git</td>
      <td>config.database.git</td>
    </tr>
    <tr>
      <td><strong>DATABASE.open</strong></td>
      <td><strong>config.commands.open.command</strong></td>
    </tr>
    <tr>
      <td><strong>DATABASE.grep</strong></td>
      <td><strong>config.commands.search.grep</strong></td>
    </tr>
    <tr>
      <td><strong>DATABASE.search_ignore_case</strong></td>
      <td><strong>config.commands.search.ignore_case</strong></td>
    </tr>
    <tr>
      <td><strong>FORMAT.month</strong></td>
      <td><strong>config.database.format.month</strong></td>
    </tr>
    <tr>
      <td><strong>FORMAT.ignore_non_standard_types</strong></td>
      <td><strong>config.parsers.bibtex.ignore_non_standard_types</strong></td>
    </tr>
    <tr>
      <td><strong>FORMAT.default_entry_type</strong></td>
      <td><strong>config.commands.edit.default_entry_type</strong></td>
    </tr>
    <tr>
      <td>TUI.default_list_args</td>
      <td>config.tui.default_list_args</td>
    </tr>
    <tr>
      <td>TUI.prompt_before_quit</td>
      <td>config.tui.prompt_before_quit</td>
    </tr>
    <tr>
      <td>TUI.reverse_order</td>
      <td>config.tui.reverse_order</td>
    </tr>
    <tr>
      <td>TUI.scroll_offset</td>
      <td>config.tui.scroll_offset</td>
    </tr>
    <tr>
      <td>KEY_BINDINGS.Add</td>
      <td>config.tui.key_bindings.add</td>
    </tr>
    <tr>
      <td>KEY_BINDINGS.Delete</td>
      <td>config.tui.key_bindings.delete</td>
    </tr>
    <tr>
      <td>KEY_BINDINGS.Edit</td>
      <td>config.tui.key_bindings.edit</td>
    </tr>
    <tr>
      <td>KEY_BINDINGS.Export</td>
      <td>config.tui.key_bindings.export</td>
    </tr>
    <tr>
      <td>KEY_BINDINGS.Filter</td>
      <td>config.tui.key_bindings.filter</td>
    </tr>
    <tr>
      <td>KEY_BINDINGS.Help</td>
      <td>config.tui.key_bindings.help</td>
    </tr>
    <tr>
      <td>KEY_BINDINGS.Modify</td>
      <td>config.tui.key_bindings.modify</td>
    </tr>
    <tr>
      <td>KEY_BINDINGS.Open</td>
      <td>config.tui.key_bindings.open</td>
    </tr>
    <tr>
      <td>KEY_BINDINGS.Prompt</td>
      <td>config.tui.key_bindings.prompt</td>
    </tr>
    <tr>
      <td>KEY_BINDINGS.Quit</td>
      <td>config.tui.key_bindings.quit</td>
    </tr>
    <tr>
      <td>KEY_BINDINGS.Redo</td>
      <td>config.tui.key_bindings.redo</td>
    </tr>
    <tr>
      <td>KEY_BINDINGS.Search</td>
      <td>config.tui.key_bindings.search</td>
    </tr>
    <tr>
      <td>KEY_BINDINGS.Select</td>
      <td>config.tui.key_bindings.select</td>
    </tr>
    <tr>
      <td>KEY_BINDINGS.Show</td>
      <td>config.tui.key_bindings.show</td>
    </tr>
    <tr>
      <td>KEY_BINDINGS.Sort</td>
      <td>config.tui.key_bindings.sort</td>
    </tr>
    <tr>
      <td>KEY_BINDINGS.Undo</td>
      <td>config.tui.key_bindings.undo</td>
    </tr>
    <tr>
      <td>KEY_BINDINGS.Wrap</td>
      <td>config.tui.key_bindings.wrap</td>
    </tr>
    <tr>
      <td>COLORS.cursor_line_fg</td>
      <td>config.tui.colors.cursor_line_fg</td>
    </tr>
    <tr>
      <td>COLORS.cursor_line_bg</td>
      <td>config.tui.colors.cursor_line_bg</td>
    </tr>
    <tr>
      <td>COLORS.top_statusbar_fg</td>
      <td>config.tui.colors.top_statusbar_fg</td>
    </tr>
    <tr>
      <td>COLORS.top_statusbar_bg</td>
      <td>config.tui.colors.top_statusbar_bg</td>
    </tr>
    <tr>
      <td>COLORS.bottom_statusbar_fg</td>
      <td>config.tui.colors.bottom_statusbar_fg</td>
    </tr>
    <tr>
      <td>COLORS.bottom_statusbar_bg</td>
      <td>config.tui.colors.bottom_statusbar_bg</td>
    </tr>
    <tr>
      <td>COLORS.search_label_fg</td>
      <td>config.tui.colors.search_label_fg</td>
    </tr>
    <tr>
      <td>COLORS.search_label_bg</td>
      <td>config.tui.colors.search_label_bg</td>
    </tr>
    <tr>
      <td>COLORS.search_query_fg</td>
      <td>config.tui.colors.search_query_fg</td>
    </tr>
    <tr>
      <td>COLORS.search_query_bg</td>
      <td>config.tui.colors.search_query_bg</td>
    </tr>
    <tr>
      <td>COLORS.popup_help_fg</td>
      <td>config.tui.colors.popup_help_fg</td>
    </tr>
    <tr>
      <td>COLORS.popup_help_bg</td>
      <td>config.tui.colors.popup_help_bg</td>
    </tr>
    <tr>
      <td>COLORS.popup_stdout_fg</td>
      <td>config.tui.colors.popup_stdout_fg</td>
    </tr>
    <tr>
      <td>COLORS.popup_stdout_bg</td>
      <td>config.tui.colors.popup_stdout_bg</td>
    </tr>
    <tr>
      <td>COLORS.popup_stderr_fg</td>
      <td>config.tui.colors.popup_stderr_fg</td>
    </tr>
    <tr>
      <td>COLORS.popup_stderr_bg</td>
      <td>config.tui.colors.popup_stderr_bg</td>
    </tr>
    <tr>
      <td>COLORS.selection_fg</td>
      <td>config.tui.colors.selection_fg</td>
    </tr>
    <tr>
      <td>COLORS.selection_bg</td>
      <td>config.tui.colors.selection_bg</td>
    </tr>
  </tbody>
</table>

<blockquote>
  <p>:warning: Notice, that the <code class="language-plaintext highlighter-rouge">KEY_BINDINGS</code> and <code class="language-plaintext highlighter-rouge">COLORS</code> sections have been moved <em>into</em> the <code class="language-plaintext highlighter-rouge">TUI</code> section.
This was not possible in the <code class="language-plaintext highlighter-rouge">INI</code>-style configuration but is the more natural location for these settings to be in.</p>
</blockquote>]]></content><author><name>Max Rossmannek</name></author><category term="programming" /><category term="cobib" /><summary type="html"><![CDATA[coBib is getting a new configuration system with the next major release, version 3.0! Although this release is by no means ready, I am already introducing the new configuration to build some other new features (which will also be part of v3.0) on top of it. This means, if you are following coBib’s development branch, you will soon be presented with a warning when using coBib stating that the old INI-style configuration is deprecated and a new Python-based one takes its place.]]></summary></entry><entry><title type="html">Testing TUI applications in Python</title><link href="/programming/testing-tui-applications-in-python/" rel="alternate" type="text/html" title="Testing TUI applications in Python" /><published>2020-08-30T00:00:00+00:00</published><updated>2020-08-30T00:00:00+00:00</updated><id>/programming/testing-tui-applications-in-python</id><content type="html" xml:base="/programming/testing-tui-applications-in-python/"><![CDATA[<p>When I decided to develop a curses-based TUI for my latest programming project, <a href="/programming/introducing-cobib/">coBib</a>, I knew from the beginning that I will need to test the features of the TUI.
However, I came to realize that achieving this feat is not as straight forward as some of the other unittests which I had implemented for this project previously.
Thus, in this post, I summarize how to test a TUI application written in Python.</p>

<h3 id="what-are-we-actually-trying-to-do-here">What are we actually trying to do here?</h3>
<p>I will start by addressing this very important question right in the beginning.
Well, the answer is actually quite simple: we want to <em>unit test</em> as many features of an application as possible.
Now, you might ask, what <em>unit testing</em> actually means.
To put it in the words of <a href="https://en.wikipedia.org/wiki/Unit_testing">Wikipedia</a>:</p>
<blockquote>
  <p>&lt;…&gt; unit testing is a software testing method by which <em>individual units</em> of source code &lt;…&gt; are tested to determine whether they are fit for use.</p>
</blockquote>

<p>Ah… :thinking:
Essentially this boils down to: “we want to test our source code in small <em>logical</em> pieces rather than as one huge black box”.
In this way, we can ensure that the individual blocks which make up our code work as intended.
Once that is the case, we can add some <a href="https://en.wikipedia.org/wiki/Integration_testing">integration</a> or <a href="https://en.wikipedia.org/wiki/System_testing">system tests</a> to ensure that all of our features combine and interact correctly, too.</p>

<h3 id="testing-in-python">Testing in Python</h3>
<p>When programming in Python you have a variety of testing frameworks to choose from (e.g. <a href="https://docs.python.org/3/library/unittest.html">unittest</a>, <a href="https://pytest.org">pytest</a>, <a href="https://github.com/onqtam/doctest">doctest</a>).
For coBib I chose to go with <code class="language-plaintext highlighter-rouge">pytest</code> but what I present in this article should work with any of those testing frameworks.</p>

<p>I do not want to go into the details of how <code class="language-plaintext highlighter-rouge">pytest</code> works but will show you a very short example test case:</p>
<div class="language-python highlighter-rouge"><div class="highlight"><pre class="highlight"><code><table class="rouge-table"><tbody><tr><td class="rouge-gutter gl"><pre class="lineno">1
2
3
4
5
6
7
8
9
10
</pre></td><td class="rouge-code"><pre><span class="kn">from</span> <span class="n">cobib</span> <span class="kn">import</span> <span class="n">zsh_helper</span>
<span class="kn">import</span> <span class="n">cobib</span>

<span class="k">def</span> <span class="nf">test_list_commands</span><span class="p">():</span>
    <span class="sh">"""</span><span class="s">Test listing commands.</span><span class="sh">"""</span>
    <span class="n">cmds</span> <span class="o">=</span> <span class="n">zsh_helper</span><span class="p">.</span><span class="nf">list_commands</span><span class="p">()</span>
    <span class="n">cmds</span> <span class="o">=</span> <span class="p">[</span><span class="n">c</span><span class="p">.</span><span class="nf">split</span><span class="p">(</span><span class="sh">'</span><span class="s">:</span><span class="sh">'</span><span class="p">)[</span><span class="mi">0</span><span class="p">]</span> <span class="k">for</span> <span class="n">c</span> <span class="ow">in</span> <span class="n">cmds</span><span class="p">]</span>
    <span class="n">expected</span> <span class="o">=</span> <span class="p">[</span><span class="n">cmd</span><span class="p">.</span><span class="nf">replace</span><span class="p">(</span><span class="sh">'</span><span class="s">Command</span><span class="sh">'</span><span class="p">,</span> <span class="sh">''</span><span class="p">).</span><span class="nf">lower</span><span class="p">()</span> <span class="k">for</span>
                <span class="n">cmd</span> <span class="ow">in</span> <span class="n">cobib</span><span class="p">.</span><span class="n">commands</span><span class="p">.</span><span class="n">__all__</span><span class="p">]</span>
    <span class="k">assert</span> <span class="nf">sorted</span><span class="p">(</span><span class="n">cmds</span><span class="p">)</span> <span class="o">==</span> <span class="nf">sorted</span><span class="p">(</span><span class="n">expected</span><span class="p">)</span>
</pre></td></tr></tbody></table></code></pre></div></div>
<p>The unittest above asserts that the <code class="language-plaintext highlighter-rouge">zsh</code> utility function <code class="language-plaintext highlighter-rouge">list_commands()</code> returns all commands that are available in coBib.
If the <code class="language-plaintext highlighter-rouge">assert</code> statement on the last line fails, so does the test.</p>

<h3 id="testing-a-tui-application">Testing a TUI application</h3>
<p>Now, let us assume that we have unittests in place for all of the basic features of our application.
However, we have written a new, fancy TUI which combines all of these features.
If we want to avoid manually testing all possible workflows in the TUI when integrating new changes, it would be great to test the TUI itself, too.
However, this is not as straight forward since we don’t have direct access to the terminal contents.</p>

<p>This is where <a href="https://github.com/selectel/pyte">pyte</a> comes into play!
What is <code class="language-plaintext highlighter-rouge">pyte</code>, you ask?</p>
<blockquote>
  <p>It’s an in memory VTXXX-compatible terminal emulator.</p>
</blockquote>

<p>This means, <code class="language-plaintext highlighter-rouge">pyte</code> allows us to emulate a terminal within which we can run our TUI.
This provides us with a programmatic access to the terminal contents, i.e. it allows us to <a href="https://en.wikipedia.org/wiki/Data_scraping#Screen_scraping">scrape the screen</a> for its contents and <code class="language-plaintext highlighter-rouge">assert</code> what is being displayed!</p>

<h3 id="how-to-setup-pyte">How to setup <code class="language-plaintext highlighter-rouge">pyte</code></h3>
<p>The <a href="https://pyte.readthedocs.io/en/latest/tutorial.html">tutorial page</a> of <code class="language-plaintext highlighter-rouge">pyte</code>’s documentation shows how straight forward it is to initialize a virtual terminal window:</p>
<div class="language-python highlighter-rouge"><div class="highlight"><pre class="highlight"><code><table class="rouge-table"><tbody><tr><td class="rouge-gutter gl"><pre class="lineno">1
2
3
4
5
</pre></td><td class="rouge-code"><pre><span class="kn">import</span> <span class="n">pyte</span>
<span class="n">screen</span> <span class="o">=</span> <span class="n">pyte</span><span class="p">.</span><span class="nc">Screen</span><span class="p">(</span><span class="mi">40</span><span class="p">,</span> <span class="mi">12</span><span class="p">)</span>
<span class="n">stream</span> <span class="o">=</span> <span class="n">pyte</span><span class="p">.</span><span class="nc">Stream</span><span class="p">(</span><span class="n">screen</span><span class="p">)</span>
<span class="n">stream</span><span class="p">.</span><span class="nf">feed</span><span class="p">(</span><span class="sa">b</span><span class="sh">"</span><span class="s">Hello World!</span><span class="sh">"</span><span class="p">)</span>
<span class="nf">print</span><span class="p">(</span><span class="n">screen</span><span class="p">.</span><span class="n">display</span><span class="p">)</span>
</pre></td></tr></tbody></table></code></pre></div></div>
<p>The last line will dump the contents of the terminal’s screen like below:</p>
<div class="language-plaintext highlighter-rouge"><div class="highlight"><pre class="highlight"><code><table class="rouge-table"><tbody><tr><td class="rouge-gutter gl"><pre class="lineno">1
2
3
4
5
6
7
8
9
10
11
12
</pre></td><td class="rouge-code"><pre>Hello World!                            


</pre></td></tr></tbody></table></code></pre></div></div>
<p>This appears to be working just as expected! :tada:</p>

<h3 id="combining-pytest-and-pyte">Combining <code class="language-plaintext highlighter-rouge">pytest</code> and <code class="language-plaintext highlighter-rouge">pyte</code></h3>
<p>After a significant amount of research on the web, diving through many Stackoverflow pages and even reaching out to one of the <code class="language-plaintext highlighter-rouge">pytest</code> developers on IRC, I finally managed to come up with a solution that seems to be flexible enough for all the testing purposes which I have encountered so far.</p>
<div class="language-python highlighter-rouge"><div class="highlight"><pre class="highlight"><code><table class="rouge-table"><tbody><tr><td class="rouge-gutter gl"><pre class="lineno">1
2
3
4
5
6
7
8
9
10
11
12
13
14
15
16
17
18
19
20
21
22
23
24
25
26
27
28
29
30
31
32
33
</pre></td><td class="rouge-code"><pre><span class="k">def</span> <span class="nf">test_tui</span><span class="p">():</span>
    <span class="sh">"""</span><span class="s">Test TUI.</span><span class="sh">"""</span>
    <span class="c1"># create pseudo-terminal
</span>    <span class="n">pid</span><span class="p">,</span> <span class="n">f_d</span> <span class="o">=</span> <span class="n">os</span><span class="p">.</span><span class="nf">forkpty</span><span class="p">()</span>
    <span class="k">if</span> <span class="n">pid</span> <span class="o">==</span> <span class="mi">0</span><span class="p">:</span>
        <span class="c1"># child process spawns TUI
</span>        <span class="n">curses</span><span class="p">.</span><span class="nf">wrapper</span><span class="p">(</span><span class="n">TUI</span><span class="p">)</span>
    <span class="k">else</span><span class="p">:</span>
        <span class="c1"># parent process sets up virtual screen of
</span>        <span class="c1"># identical size
</span>        <span class="n">screen</span> <span class="o">=</span> <span class="n">pyte</span><span class="p">.</span><span class="nc">Screen</span><span class="p">(</span><span class="mi">80</span><span class="p">,</span> <span class="mi">24</span><span class="p">)</span>
        <span class="n">stream</span> <span class="o">=</span> <span class="n">pyte</span><span class="p">.</span><span class="nc">ByteStream</span><span class="p">(</span><span class="n">screen</span><span class="p">)</span>
        <span class="c1"># scrape pseudo-terminal's screen
</span>        <span class="k">while</span> <span class="bp">True</span><span class="p">:</span>
            <span class="k">try</span><span class="p">:</span>
                <span class="p">[</span><span class="n">f_d</span><span class="p">],</span> <span class="n">_</span><span class="p">,</span> <span class="n">_</span> <span class="o">=</span> <span class="n">select</span><span class="p">.</span><span class="nf">select</span><span class="p">(</span>
                    <span class="p">[</span><span class="n">f_d</span><span class="p">],</span> <span class="p">[],</span> <span class="p">[],</span> <span class="mi">1</span><span class="p">)</span>
            <span class="nf">except </span><span class="p">(</span><span class="nb">KeyboardInterrupt</span><span class="p">,</span> <span class="nb">ValueError</span><span class="p">):</span>
                <span class="c1"># either test was interrupted or the
</span>                <span class="c1"># file descriptor of the child process
</span>                <span class="c1"># provides nothing to be read
</span>                <span class="k">break</span>
            <span class="k">else</span><span class="p">:</span>
                <span class="k">try</span><span class="p">:</span>
                    <span class="c1"># scrape screen of child process
</span>                    <span class="n">data</span> <span class="o">=</span> <span class="n">os</span><span class="p">.</span><span class="nf">read</span><span class="p">(</span><span class="n">f_d</span><span class="p">,</span> <span class="mi">1024</span><span class="p">)</span>
                    <span class="n">stream</span><span class="p">.</span><span class="nf">feed</span><span class="p">(</span><span class="n">data</span><span class="p">)</span>
                <span class="k">except</span> <span class="nb">OSError</span><span class="p">:</span>
                    <span class="c1"># reading empty
</span>                    <span class="k">break</span>
        <span class="k">for</span> <span class="n">line</span> <span class="ow">in</span> <span class="n">screen</span><span class="p">.</span><span class="n">display</span><span class="p">:</span>
            <span class="nf">print</span><span class="p">(</span><span class="n">line</span><span class="p">)</span>
        <span class="c1"># now, do some assertions (see later)
</span></pre></td></tr></tbody></table></code></pre></div></div>
<p>That’s quite a test function… So let’s break it down:</p>
<ol>
  <li>On line 4 we are forking the process into a parent and child process.
This is necessary because otherwise our TUI application will take full control of the process and disallow us from actually running any tests on it.</li>
  <li>On lines 5 and 8 we differentiate between the parent and child process, starting our TUI application on the child process<sup id="fnref:1"><a href="#fn:1" class="footnote" rel="footnote" role="doc-noteref">1</a></sup> (line 7).</li>
  <li>In the parent process we can then use <code class="language-plaintext highlighter-rouge">pyte</code> to initialize a pseudo-terminal (as explained in <a href="#how-to-setup-pyte">How to setup <code class="language-plaintext highlighter-rouge">pyte</code></a>).</li>
  <li>The endless loop starting on line 14 is then used to scrape the terminal content.
We do so by means of the <a href="https://docs.python.org/3/library/select.html#select.select"><code class="language-plaintext highlighter-rouge">select.select()</code> method</a> which waits for the file descriptor, <code class="language-plaintext highlighter-rouge">f_d</code>, until it is ready for reading.
    <ol>
      <li>If nothing is available for reading or the test interrupts, we <code class="language-plaintext highlighter-rouge">break</code> the loop on line 22 which will eventually lead to a failing test (that is, once we add some assertions as shown below).</li>
      <li>The <code class="language-plaintext highlighter-rouge">else</code> clause of the <a href="https://docs.python.org/3/library/select.html#select.select"><code class="language-plaintext highlighter-rouge">try</code> block</a> will execute if no exception was raised.
Here, we simply scrape the screen of the child process and feed its contents into the pseudo-terminal.
The reason for not directly operating on the data is to also allow easier processing of terminal attributes such as colors, etc.</li>
    </ol>
  </li>
  <li>Finally, on line 33 we can start adding some <code class="language-plaintext highlighter-rouge">assert</code> statements to check the contents of the terminal window.
Note, that I print the contents of the screen prior to this because this will allow easy debugging when a test fails<sup id="fnref:2"><a href="#fn:2" class="footnote" rel="footnote" role="doc-noteref">2</a></sup>.</li>
</ol>

<h3 id="asserting-the-pseudo-terminal-contents">Asserting the pseudo-terminal contents</h3>
<p>Now, it is finally time to <code class="language-plaintext highlighter-rouge">assert</code> the pseudo-terminal contents! :raised_hands:
I like to <a href="https://docs.pytest.org/en/stable/parametrize.html#pytest-mark-parametrize-parametrizing-test-functions"><em>parametrize</em> my test functions</a> which allows me to run the same test with different inputs.
In the case of this TUI test it makes sense to have function arguments for the <em>key strokes</em> which should be send to the TUI and for the <em>assertion function</em> which should be used to <code class="language-plaintext highlighter-rouge">assert</code> the outcome.
This will look something like this:</p>
<div class="language-python highlighter-rouge"><div class="highlight"><pre class="highlight"><code><table class="rouge-table"><tbody><tr><td class="rouge-gutter gl"><pre class="lineno">1
2
3
4
5
6
7
8
9
10
11
12
13
14
15
16
17
18
19
20
21
22
23
24
25
26
27
28
29
30
31
32
33
34
35
36
37
38
39
40
</pre></td><td class="rouge-code"><pre><span class="nd">@pytest.mark.parametrize</span><span class="p">([</span><span class="sh">'</span><span class="s">keys</span><span class="sh">'</span><span class="p">,</span> <span class="sh">'</span><span class="s">assertion</span><span class="sh">'</span><span class="p">],</span> <span class="p">[</span>
        <span class="p">[</span><span class="sh">'</span><span class="s">?</span><span class="sh">'</span><span class="p">,</span> <span class="n">assert_help_screen</span><span class="p">],</span>
    <span class="p">])</span>
<span class="k">def</span> <span class="nf">test_tui</span><span class="p">(</span><span class="n">keys</span><span class="p">,</span> <span class="n">assertion</span><span class="p">):</span>
    <span class="sh">"""</span><span class="s">Test TUI.

    Args:
        keys (str): keys to be send to the TUI.
        assertion (Callable): function to run the
                              assertions for the keys
                              to be tested.
    </span><span class="sh">"""</span>
    <span class="n">pid</span><span class="p">,</span> <span class="n">f_d</span> <span class="o">=</span> <span class="n">os</span><span class="p">.</span><span class="nf">forkpty</span><span class="p">()</span>
    <span class="k">if</span> <span class="n">pid</span> <span class="o">==</span> <span class="mi">0</span><span class="p">:</span>
        <span class="n">curses</span><span class="p">.</span><span class="nf">wrapper</span><span class="p">(</span><span class="n">TUI</span><span class="p">)</span>
    <span class="k">else</span><span class="p">:</span>
        <span class="n">screen</span> <span class="o">=</span> <span class="n">pyte</span><span class="p">.</span><span class="nc">Screen</span><span class="p">(</span><span class="mi">80</span><span class="p">,</span> <span class="mi">24</span><span class="p">)</span>
        <span class="n">stream</span> <span class="o">=</span> <span class="n">pyte</span><span class="p">.</span><span class="nc">ByteStream</span><span class="p">(</span><span class="n">screen</span><span class="p">)</span>
        <span class="c1">### SEND KEYS
</span>        <span class="c1"># send keys char-wise to TUI
</span>        <span class="k">for</span> <span class="n">key</span> <span class="ow">in</span> <span class="n">keys</span><span class="p">:</span>
            <span class="n">os</span><span class="p">.</span><span class="nf">write</span><span class="p">(</span><span class="n">f_d</span><span class="p">,</span> <span class="nb">str</span><span class="p">.</span><span class="nf">encode</span><span class="p">(</span><span class="n">key</span><span class="p">))</span>
        <span class="c1">### END
</span>        <span class="k">while</span> <span class="bp">True</span><span class="p">:</span>
            <span class="k">try</span><span class="p">:</span>
                <span class="p">[</span><span class="n">f_d</span><span class="p">],</span> <span class="n">_</span><span class="p">,</span> <span class="n">_</span> <span class="o">=</span> <span class="n">select</span><span class="p">.</span><span class="nf">select</span><span class="p">(</span>
                    <span class="p">[</span><span class="n">f_d</span><span class="p">],</span> <span class="p">[],</span> <span class="p">[],</span> <span class="mi">1</span><span class="p">)</span>
            <span class="nf">except </span><span class="p">(</span><span class="nb">KeyboardInterrupt</span><span class="p">,</span> <span class="nb">ValueError</span><span class="p">):</span>
                <span class="k">break</span>
            <span class="k">else</span><span class="p">:</span>
                <span class="k">try</span><span class="p">:</span>
                    <span class="n">data</span> <span class="o">=</span> <span class="n">os</span><span class="p">.</span><span class="nf">read</span><span class="p">(</span><span class="n">f_d</span><span class="p">,</span> <span class="mi">1024</span><span class="p">)</span>
                    <span class="n">stream</span><span class="p">.</span><span class="nf">feed</span><span class="p">(</span><span class="n">data</span><span class="p">)</span>
                <span class="k">except</span> <span class="nb">OSError</span><span class="p">:</span>
                    <span class="k">break</span>
        <span class="k">for</span> <span class="n">line</span> <span class="ow">in</span> <span class="n">screen</span><span class="p">.</span><span class="n">display</span><span class="p">:</span>
            <span class="nf">print</span><span class="p">(</span><span class="n">line</span><span class="p">)</span>
        <span class="c1">### ASSERT OUTCOME
</span>        <span class="nf">assertion</span><span class="p">(</span><span class="n">screen</span><span class="p">)</span>
        <span class="c1">### END
</span></pre></td></tr></tbody></table></code></pre></div></div>
<p>As you can see, compared to before we now have two additional sections:</p>
<ol>
  <li>On lines 21-22 we iterate a string of key strokes and send them char-wise to the child process, triggering events in the TUI application.</li>
  <li>And finally, on line 39 we have added a call to an <code class="language-plaintext highlighter-rouge">assertion</code> function which is also provided as an input argument.
In this specific example the function looks something like this:
    <div class="language-python highlighter-rouge"><div class="highlight"><pre class="highlight"><code><table class="rouge-table"><tbody><tr><td class="rouge-gutter gl"><pre class="lineno">1
2
3
4
5
6
</pre></td><td class="rouge-code"><pre><span class="k">def</span> <span class="nf">assert_help_screen</span><span class="p">(</span><span class="n">screen</span><span class="p">):</span>
 <span class="sh">"""</span><span class="s">Asserts the contents of the Help screen.</span><span class="sh">"""</span>
 <span class="k">assert</span> <span class="sh">"</span><span class="s">coBib TUI Help</span><span class="sh">"</span> <span class="ow">in</span> <span class="n">screen</span><span class="p">.</span><span class="n">display</span><span class="p">[</span><span class="mi">2</span><span class="p">]</span>
 <span class="k">for</span> <span class="n">cmd</span><span class="p">,</span> <span class="n">desc</span> <span class="ow">in</span> <span class="n">TUI</span><span class="p">.</span><span class="n">HELP_DICT</span><span class="p">.</span><span class="nf">items</span><span class="p">():</span>
     <span class="k">assert</span> <span class="nf">any</span><span class="p">(</span><span class="sh">"</span><span class="s">{:&lt;8} {}</span><span class="sh">"</span><span class="p">.</span><span class="nf">format</span><span class="p">(</span><span class="n">cmd</span><span class="o">+</span><span class="sh">'</span><span class="s">:</span><span class="sh">'</span><span class="p">,</span> <span class="n">desc</span><span class="p">)</span> <span class="ow">in</span>
                <span class="n">line</span> <span class="k">for</span> <span class="n">line</span> <span class="ow">in</span> <span class="n">screen</span><span class="p">.</span><span class="n">display</span><span class="p">[</span><span class="mi">4</span><span class="p">:</span><span class="mi">21</span><span class="p">])</span>
</pre></td></tr></tbody></table></code></pre></div>    </div>
    <p>This function is just meant as an example to showcase how you could go about asserting the contents of your terminal are correct.</p>
  </li>
</ol>

<h3 id="further-extensions">Further extensions</h3>
<p>That is all for now! :slightly_smiling_face:
I do have a few more features in my <a href="https://gitlab.com/cobib/cobib/-/blob/master/test/test_tui.py">coBib testing suite</a> which would have made this post even longer.
So please, feel free to check them out!
Some examples of what you will be able to find are:</p>
<ul>
  <li>using <a href="https://docs.pytest.org/en/stable/fixture.html#fixture-finalization-executing-teardown-code"><code class="language-plaintext highlighter-rouge">pytest</code> fixtures and executing teardown code</a></li>
  <li>passing additional <code class="language-plaintext highlighter-rouge">kwargs</code> to the <code class="language-plaintext highlighter-rouge">assertion</code> function (take a look at my <code class="language-plaintext highlighter-rouge">test_tui()</code>)</li>
  <li>testing terminal color attributes (take a look at <code class="language-plaintext highlighter-rouge">test_tui_config_color()</code>)</li>
  <li>testing resize events (take a look at <code class="language-plaintext highlighter-rouge">test_tui_resize()</code>)</li>
</ul>
<div class="footnotes" role="doc-endnotes">
  <ol>
    <li id="fn:1">
      <p>The <a href="https://docs.python.org/3/library/os.html#os.forkpty"><code class="language-plaintext highlighter-rouge">os.forkpty()</code></a> method assigns the pid 0 to the child process. <a href="#fnref:1" class="reversefootnote" role="doc-backlink">&#8617;</a></p>
    </li>
    <li id="fn:2">
      <p><code class="language-plaintext highlighter-rouge">pytest</code> will only print to <code class="language-plaintext highlighter-rouge">stdout</code> when a test fails unless you run the tests verbosely. <a href="#fnref:2" class="reversefootnote" role="doc-backlink">&#8617;</a></p>
    </li>
  </ol>
</div>]]></content><author><name>Max Rossmannek</name></author><category term="programming" /><category term="python" /><summary type="html"><![CDATA[When I decided to develop a curses-based TUI for my latest programming project, coBib, I knew from the beginning that I will need to test the features of the TUI. However, I came to realize that achieving this feat is not as straight forward as some of the other unittests which I had implemented for this project previously. Thus, in this post, I summarize how to test a TUI application written in Python.]]></summary></entry><entry><title type="html">Introducing coBib</title><link href="/programming/introducing-cobib/" rel="alternate" type="text/html" title="Introducing coBib" /><published>2020-05-25T00:00:00+00:00</published><updated>2020-05-25T00:00:00+00:00</updated><id>/programming/introducing-cobib</id><content type="html" xml:base="/programming/introducing-cobib/"><![CDATA[<p><a href="https://gitlab.com/cobib/cobib">coBib</a> is a console-based bibliography manager written in Python.
I started developing it a little more than a year ago in the need of a more simplistic and easy-to-use alternative to Mendeley, Zotero and the like.
But most importantly I was looking for a tool to move one more important piece of my workflow into a more comfortable and cozy setting: my terminal! :smile:</p>

<p>Over the past year a few major design features have crystallized out which include:</p>
<ol>
  <li>a plain text database (since <a href="https://gitlab.com/cobib/cobib/-/releases/v0.2">v0.2</a>)</li>
  <li>full TUI support (since <a href="https://gitlab.com/cobib/cobib/-/releases/v2.0.0a1">v2.0.0a1</a>)</li>
</ol>

<h3 id="plain-text-storage">Plain Text Storage</h3>
<p>The redesign to use a YAML-based plain text database for storage instead of the sqlite3 database in the early proof-of-concept has become an important aspect to me.
Not only is it <strong>human-readable</strong> but it can also be tracked easily with <strong>version control</strong> and ensures independence of the previous two features with respect to the file format and tool to read it in.</p>

<h3 id="terminal-user-interface">Terminal User Interface</h3>
<p>Another major change was the introduction of a simple curses-based TUI which is currently in the beta stage of development: <a href="https://gitlab.com/cobib/cobib/-/releases/v2.0.0b4">v2.0.0b4</a>.
This was an important change since I had realized that handling increasingly large literature database meant a manual and tedious parsing of long <code class="language-plaintext highlighter-rouge">stdout</code> outputs to the terminal.
The new TUI simplifies this process through an initial loading of the database into the program allowing subsequently instantaneous operations.</p>

<p>It was important to me that the TUI supports all operations that are available on the command line in a meaningful fashion.
In the following I would like to introduce a simple workflow with coBib.</p>

<h2 id="working-with-cobib">Working with coBib</h2>

<h3 id="setup">Setup</h3>
<p><strong>Before</strong> doing anything, you have to run <code class="language-plaintext highlighter-rouge">cobib init</code> which will initialize the database file.
After this single step, you are good to go!</p>

<h3 id="using-the-tui">Using the TUI</h3>
<p>When you simply run <code class="language-plaintext highlighter-rouge">cobib</code> without any subcommand you will be greeted with the initial screen of the TUI which lists all entries in your database.</p>
<blockquote>
  <p>:warning: Obviously, when you run this for the first time, this list is most likely empty.</p>
</blockquote>

<figure>
    <a href="/assets/images/cobib/list.png"><img src="/assets/images/cobib/list.png" /></a>
    <figcaption>After startup, the TUI presents a scrollable list of all database entries.</figcaption>
</figure>

<p>There are a few things going on here:</p>
<ol>
  <li>You can see two status lines: one at the top; and one at the bottom.
    <ul>
      <li>The top one includes coBib’s version information as well as some statistics on your database.</li>
      <li>The bottom one provides a quick overview of the default key bindings of the most import operations.</li>
    </ul>
  </li>
  <li>In between the two status lines, you are presented with a <strong>scrollable</strong> buffer listing your database entries.
    <ul>
      <li>You can navigate this buffer with Vim-like bindings of <code class="language-plaintext highlighter-rouge">h</code>, <code class="language-plaintext highlighter-rouge">j</code>, <code class="language-plaintext highlighter-rouge">k</code> and <code class="language-plaintext highlighter-rouge">l</code>, but the arrow keys also work if you prefer that.</li>
      <li><code class="language-plaintext highlighter-rouge">g</code> and <code class="language-plaintext highlighter-rouge">G</code> allow you to quickly jump to the beginning and end of the buffer, respectively.</li>
      <li>You can <strong>quit</strong> the buffer with <code class="language-plaintext highlighter-rouge">q</code>.</li>
    </ul>
  </li>
</ol>

<p>On startup, the entry list contains the same information as the result of <code class="language-plaintext highlighter-rouge">cobib list -l</code> (by default, that is).
Thus, it presents to you a two-column table with the IDs and titles of your database entries.</p>

<h3 id="adding-editing-and-deleting-entries">Adding, Editing and Deleting Entries</h3>
<p>You can <strong>add</strong> (<code class="language-plaintext highlighter-rouge">a</code>), <strong>edit</strong> (<code class="language-plaintext highlighter-rouge">e</code>) and <strong>delete</strong> (<code class="language-plaintext highlighter-rouge">d</code>) entries by pressing their respective keys.</p>

<h4 id="add">Add</h4>
<p>This command opens the command prompt below the bottom status line and populates it with <code class="language-plaintext highlighter-rouge">:add </code>.
Here, you have the full functionality of the command line interface at your hands.
This means you can add new entries to your database by providing DOIs, arXiv IDs or even bibtex files.
You can also provide custom <strong>labels</strong>, <strong>files</strong> and <strong>tags</strong>.
For more information refer to the man page or try <code class="language-plaintext highlighter-rouge">cobib add --help</code>.</p>

<h4 id="edit">Edit</h4>
<p>This command will open the YAML-representation of the currently selected entry of the buffer in your favorite text editor (as specified by <code class="language-plaintext highlighter-rouge">$EDITOR</code>).
Here, you get full control over the contents of that entry, so be mindful of your edits!</p>

<h4 id="delete">Delete</h4>
<p>This command will delete the currently selected entry of the buffer.</p>
<blockquote>
  <p>:no_entry: There is no safety net, so unless you have a backup of your database, this can lead to permanent data loss!</p>
</blockquote>

<h3 id="viewing-entries">Viewing Entries</h3>
<p>Now, that you actually have some entries in your database, it is definitely of interest on how to view these!</p>

<figure>
    <a href="/assets/images/cobib/show.png"><img src="/assets/images/cobib/show.png" /></a>
    <figcaption>Entries can be shown in the bibtex representation and the buffer can be wrapped for improved readability of long lines.</figcaption>
</figure>

<h4 id="show">Show</h4>
<p>This command is triggered when you hit <code class="language-plaintext highlighter-rouge">Enter</code> or <code class="language-plaintext highlighter-rouge">Return</code>.
It will replace the contents of the buffer with the bibtex representation of the selected entry.
Once again, you can scroll and quit this buffer as before.</p>

<h4 id="wrap">Wrap</h4>
<p>The <strong>wrap</strong> command can come in handy especially in this <code class="language-plaintext highlighter-rouge">show</code> buffer when your database contains the complete abstracts of your references but it is also available in the normal (the <code class="language-plaintext highlighter-rouge">list</code> buffer) which comes in handy when starting coBib in a rather narrow terminal window.
By pressing <code class="language-plaintext highlighter-rouge">w</code> you can toggle <em>line wrapping</em>: i.e. whether lines continue beyond the right edge of your window and are only visible through scrolling or whether they get wrapped to continue on the next line with a visual indent.</p>

<h4 id="open">Open</h4>
<p>One more command is available through <code class="language-plaintext highlighter-rouge">o</code> which will <strong>open</strong> any associated item of the entry’s <code class="language-plaintext highlighter-rouge">file</code> field.
This is achieved through <code class="language-plaintext highlighter-rouge">xdg-open</code> and <code class="language-plaintext highlighter-rouge">open</code> on Linux and Mac OS, respectively.
If no item is associated with the selected entry, an error is shown in the command prompt at the bottom of the window.</p>

<h3 id="filtering-the-list">Filtering the list</h3>
<p>Especially when your database becomes very large, being able to narrow the listed entries down through <strong>filters</strong> is an important function.
I will not go into the technical details of the filtering mechanics in too much detail here and instead try to explain the gist of it with some examples.
For more information, please take a look at the man page or try <code class="language-plaintext highlighter-rouge">cobib list --help</code>.</p>

<h4 id="filter">Filter</h4>
<p>When pressing <code class="language-plaintext highlighter-rouge">f</code> you are placed into the command prompt at the bottom of the window.
There you can add filters to the <code class="language-plaintext highlighter-rouge">list</code> query to narrow down the entries to be presented in the buffer above.
The filter mechanics are most easily explained with an example:</p>
<div class="language-plaintext highlighter-rouge"><div class="highlight"><pre class="highlight"><code><table class="rouge-table"><tbody><tr><td class="rouge-gutter gl"><pre class="lineno">1
</pre></td><td class="rouge-code"><pre>:list ++title Qiskit
</pre></td></tr></tbody></table></code></pre></div></div>
<p>This will list only those entries whose <code class="language-plaintext highlighter-rouge">title</code> field <strong>contains</strong> the word “Qiskit”.
You can also invert this filter and list only those entries which do <strong>not</strong> contain the word by typing:</p>
<div class="language-plaintext highlighter-rouge"><div class="highlight"><pre class="highlight"><code><table class="rouge-table"><tbody><tr><td class="rouge-gutter gl"><pre class="lineno">1
</pre></td><td class="rouge-code"><pre>:list --title Qiskit
</pre></td></tr></tbody></table></code></pre></div></div>
<p>As you can see, keywords with <code class="language-plaintext highlighter-rouge">++</code> prefixed represent positively matching filters, while those prefixed with <code class="language-plaintext highlighter-rouge">--</code> must negatively match.</p>

<p>For filters you may use <strong>any</strong> name for a field present in your database.
Thus, in the above example, <code class="language-plaintext highlighter-rouge">title</code> could be replaced by any word describing such a field.
Common examples include <code class="language-plaintext highlighter-rouge">author</code>, <code class="language-plaintext highlighter-rouge">year</code>, <code class="language-plaintext highlighter-rouge">tags</code>, etc.
For a complete list of the available filters of your specific database you can run <code class="language-plaintext highlighter-rouge">cobib list --help</code>.</p>

<p>There is one more important aspect to filters: <strong>combinations</strong>!
You can combine any number of filters as you please, e.g.</p>
<div class="language-plaintext highlighter-rouge"><div class="highlight"><pre class="highlight"><code><table class="rouge-table"><tbody><tr><td class="rouge-gutter gl"><pre class="lineno">1
</pre></td><td class="rouge-code"><pre>:list ++author Bravyi --author Kitaev
</pre></td></tr></tbody></table></code></pre></div></div>
<p>will list all entries which have “Bravyi” as their author but <strong>not</strong> “Kitaev”.
Thus, multiple filters are combined with <em>logical ANDs</em>.
If you would rather combine all filters with <em>logical ORs</em>, you can add <code class="language-plaintext highlighter-rouge">-x</code> or <code class="language-plaintext highlighter-rouge">--or</code> as an argument to your <code class="language-plaintext highlighter-rouge">list</code> query.</p>

<blockquote>
  <p>:scroll: If you want to remove a filter from your query to expand the number of listed entries, you can press <code class="language-plaintext highlighter-rouge">f</code> once more and edit the filters in the command prompt.</p>
</blockquote>

<h4 id="sorting">Sorting</h4>
<p>Filtering entries would only be half as useful if you could not sort the resulting list.
This is what the <strong>sort</strong> (<code class="language-plaintext highlighter-rouge">s</code>) command is for.
Again, an example will speak for itself:</p>
<div class="language-plaintext highlighter-rouge"><div class="highlight"><pre class="highlight"><code><table class="rouge-table"><tbody><tr><td class="rouge-gutter gl"><pre class="lineno">1
</pre></td><td class="rouge-code"><pre>:list -s year
</pre></td></tr></tbody></table></code></pre></div></div>
<p>This will sort the list of entries by <code class="language-plaintext highlighter-rouge">year</code>.
You can <em>reverse</em> the sorting order by adding the argument <code class="language-plaintext highlighter-rouge">-r</code> or <code class="language-plaintext highlighter-rouge">--reverse</code> to your <code class="language-plaintext highlighter-rouge">list</code> query.</p>

<blockquote>
  <p>:scroll: Just like removing filters you can remove sorting keys after pressing <code class="language-plaintext highlighter-rouge">s</code> once more.</p>
</blockquote>

<h4 id="export">Export</h4>
<p>Finally, the <strong>export</strong> (<code class="language-plaintext highlighter-rouge">x</code>) command allows exporting your database to bibtex format or even a zip file which will include all associated <code class="language-plaintext highlighter-rouge">file</code> items.
You can even combine the <a href="#Filter">filters</a> described above with the export command to selectively export a subset of your database!</p>
<div class="language-plaintext highlighter-rouge"><div class="highlight"><pre class="highlight"><code><table class="rouge-table"><tbody><tr><td class="rouge-gutter gl"><pre class="lineno">1
</pre></td><td class="rouge-code"><pre>:export -b 2020.bib -- ++year 2020
</pre></td></tr></tbody></table></code></pre></div></div>
<p>In the example above the <code class="language-plaintext highlighter-rouge">--</code> marks the separation of the arguments of the <code class="language-plaintext highlighter-rouge">export</code> and the <code class="language-plaintext highlighter-rouge">list</code> command.
You can find detailed information on how this command works in the man page or with <code class="language-plaintext highlighter-rouge">cobib export --help</code>.</p>

<h2 id="outlook">Outlook</h2>
<p>I hope you enjoyed this short introduction to cOBib and find it to be a useful tool and welcome addition to your terminal workflow! :tada:</p>

<p>Amongst minor improvements to make some of the interactions smoother I have planned several larger ideas which I want to implement for future releases :rocket:</p>
<ol>
  <li>implement a <code class="language-plaintext highlighter-rouge">search</code> command which should complement the <a href="#filter">filtering</a> mechanism described earlier to allow field-independent search.
 This could also be extended to nested searching of associated PDF files.</li>
  <li>implement a <code class="language-plaintext highlighter-rouge">select</code> command allowing to visually select multiple entries to operate on.
 Obviously, this will be solely a TUI feature.</li>
</ol>

<h2 id="resources">Resources</h2>
<p>You can find more information on everything covered here as well as <strong>configuration</strong> options and more at:</p>
<ul>
  <li>the man page: <code class="language-plaintext highlighter-rouge">man cobib</code></li>
  <li>the integrated help: <code class="language-plaintext highlighter-rouge">cobib --help</code> and <code class="language-plaintext highlighter-rouge">cobib &lt;subcommand&gt; --help</code></li>
  <li>the <a href="https://gitlab.com/cobib/cobib">Gitlab repository</a></li>
  <li>the <a href="https://gitlab.com/cobib/cobib/issues">issue tracker</a></li>
</ul>]]></content><author><name>Max Rossmannek</name></author><category term="programming" /><category term="cobib" /><summary type="html"><![CDATA[coBib is a console-based bibliography manager written in Python. I started developing it a little more than a year ago in the need of a more simplistic and easy-to-use alternative to Mendeley, Zotero and the like. But most importantly I was looking for a tool to move one more important piece of my workflow into a more comfortable and cozy setting: my terminal! :smile:]]></summary></entry></feed>